Other Stuff

Foreman 3D print

foremanS

Here is a pic of my latest 3D print, the foreman in 1:29 scale. This time I upped the polygon count x 100 and he looks a bit better detail wise. I now have a simple way to get a figure from Makehuman into DAZ3D. This is great because now I don’t need the DAZ meshes anymore- I can create a nice variety of young/old/short/tall/fat/skinny people and pose them as I like for a 3D print. Very nice!

sound

I’m working on a new design, a sound card for a G scale diesel locomotive. Since I will be running this with R/C, I need a sound card that accepts servo pulses from a standard R/C receiver. I think I’ve finally settled on a design, so here is a pic as I’ve laid it out on a Radio Shack breadboard. On it are two stereo mp3 boards, an Atmel ATTiny84 microprocessor, a 4 channel mixer based on a LM3900 and a 8 pin power amp.

txhack

I’ve taken an old airplane radio and hacked it down to train size. Channel 1 is now a pot for speed and the two push buttons alternate a servo ‘position’ on channel 2. Not enough I know but this is just a quick prototype.

The tray has my Android tablet where I’m running an html5 page talking to a tornado instance on the server. The page takes finger presses and sends them via tornado back to the server. It turns them into servo movements out ‘in the field’ via Wixel wireless and Python to change the turnouts. Whew. Long path there but it works quite well.

Here is a refactor of my rail editor experiments to make a more generic control interface for my wireless servo widgets. This one is ‘uncompiled’ (if that’s a word) so you can take a look at the source if you like. It’s mostly javascript controlling the html5 canvas with some PHP thrown in to do the file save/load. I’ve tried to make it relatively easy to modify so you can add your own tiles and symbols. Note that this is not meant to be a session based editing tool, it saves one file and is meant to do realtime control on a closed web system with tornado (Raspberry Pi)- so don’t try to hack on my server please. (note: I’ve disabled file saving and there is no tornado web socket server on this box so you will see some errors in the web console if you try that)

You can try out the actual program by clicking ON THIS LINK

editor

To use this, click a symbol from the palette on the right and then click where you want that symbol to be placed. To erase a symbol, left click on that spot. Since this is meant to be a control surface for a real time web implementation, the ‘wixel’ button at the top is used to set the number of the slave widget (0-63) and the r/c servo that widget controls (0-5). Note this is not implemented completely in this demo, however I will be using the tornado code base I’ve posted in my other posts here, realtime control of servos, see the side bar for a link to that post.

UPDATE: October 28, 2013

I’ve released all of the wixel and html5 code for this project, you can find details here: HERE


FINALLY, the power returns and I have a chance to test my breakouts! First test is great. I have the Raspberry Pi driving the master Wixel via USB. This slave Wixel, soldered into my breakout board, sits on the other side of my shop. A 5v wall wart provides the power. This is a nice mix of micro servos, minis and three standards. Works great!

In case you have not followed all my posts, what I have here is a master wixel plugged into the Raspberry Pi. Using the built in packet addressing mode of the TI processor (check out the Data Sheet), it sends servo commands to each slave in a round robin sort of protocol. Each slave can control up to 6 servos and return 3 analog inputs to the master.

I’m getting a really good update rate of about 4ms per slave. Once started, it just keeps running, the Raspberry Pi, via the USB to the master, just has to write a servo value into a table and on the next turn for that slave, it’s updated. This frees the Pi from any work at all in maintaining the network, it’s all auto-magic.

PCBservo

Here are some more pics of the widget.

wixelpcb2

I’ve decided that standing it up at 90 degrees like in other pics is not worth it. Much easier just to solder it in like this:

wixelpcb1

Here is a LINK to a previous post about the breakout boards. And ANOTHER that has some s/w details. Note, I have NOT released the internal code apps for the Wixels yet, I’m not sure if I will or not, depends on the results of my next project.

Work progresses on the control interface. After fooling a bit with an Android native app, I decided that was way too overkill. So here is the same idea implemented in HTML5. It will run on pretty much anything, or I hope it will as it’s browser based.

Here is a link to a basic version. There is no save or load, it’s just the framework-

RailEdit

The workflow is that you click a symbol, then click where you want it on the grid. This allows you to build a route that resembles the control for any railroad layout. The right mouse button clears a symbol from the map. It still needs a load and save option and finally, I will need a run module page that will load this file and allow you to control vs editing.

The path is a web page load from the RPi, with tornado passing down data to the master Wixel. From there the master will communicate with all the respective slaves over wireless, allowing me to touch a switch icon on the tablet and have the servo at the far end of the chain move the turnout. The HTML5 logic will then redraw the route in color to indicate where the train is going to go. That’s the plan anyhow. There are lots of possibilities with this protocol model, anything that needs R/C servos controlled over 2.4ghz wireless from the Raspberry Pi. Or any master for that matter.

I’ve already tested the basic code on the RPi via lighttp to my Android tablet and it works great. More logic to put in but the idea here is to enable the editing and control on any device, laptop, desktop or tablet. So far I’m very happy with this project and I’m getting close to completion.

Later I’d like to actually track the trains with RFID (or something) and animate that somehow on the tablet. However, that is down the road a bit, I’m going to limit my scope here on this one so I can finish it up.

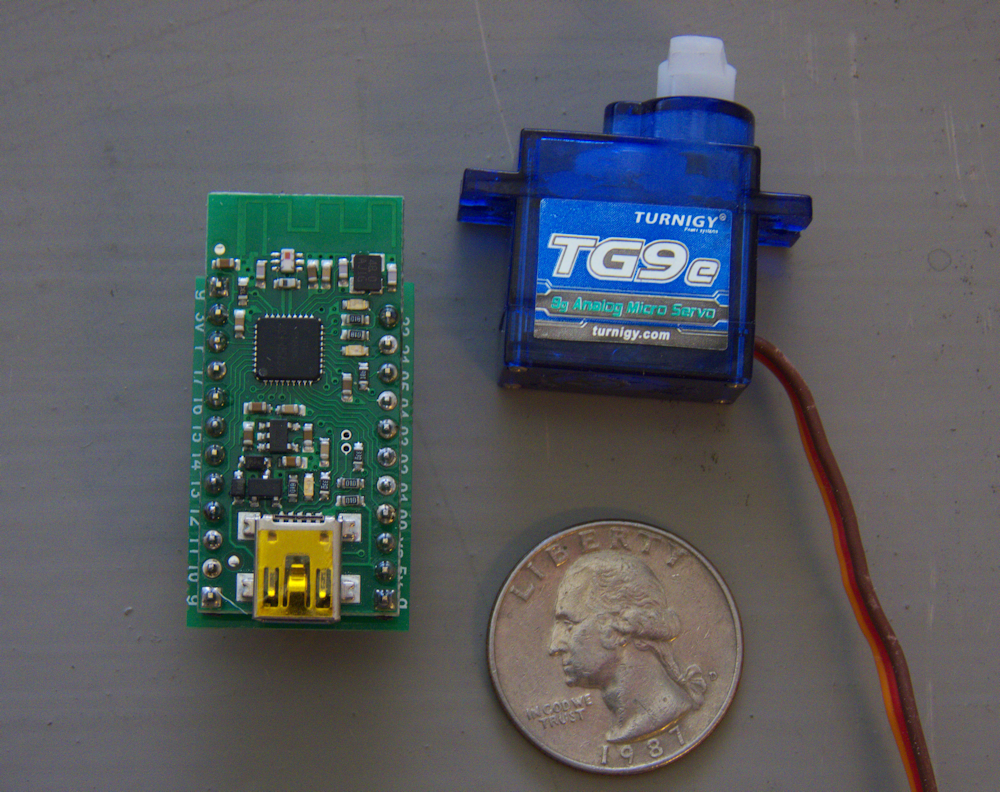
If you have been following my posts here you know I have been working on a master/slave set of apps for the Pololu Wixel module, with my specific thing being large scale garden railroads. But I think this will work for lots of applications so I’m going to try to distribute a kit.

Anyhow, what this system entails is a master Wixel connected to a Raspberry Pi (although any host would work) using USB. The master can control and monitor up to 64 wireless slaves. Each slave can control 6 servos and send 3 analog inputs back to the master.

I have had the servo outputs working on multiple slaves for some time now, today I got the analog inputs to flow back to the master and the Python Class now reads them correctly. So the Software layer is now complete and transparent. It just runs.

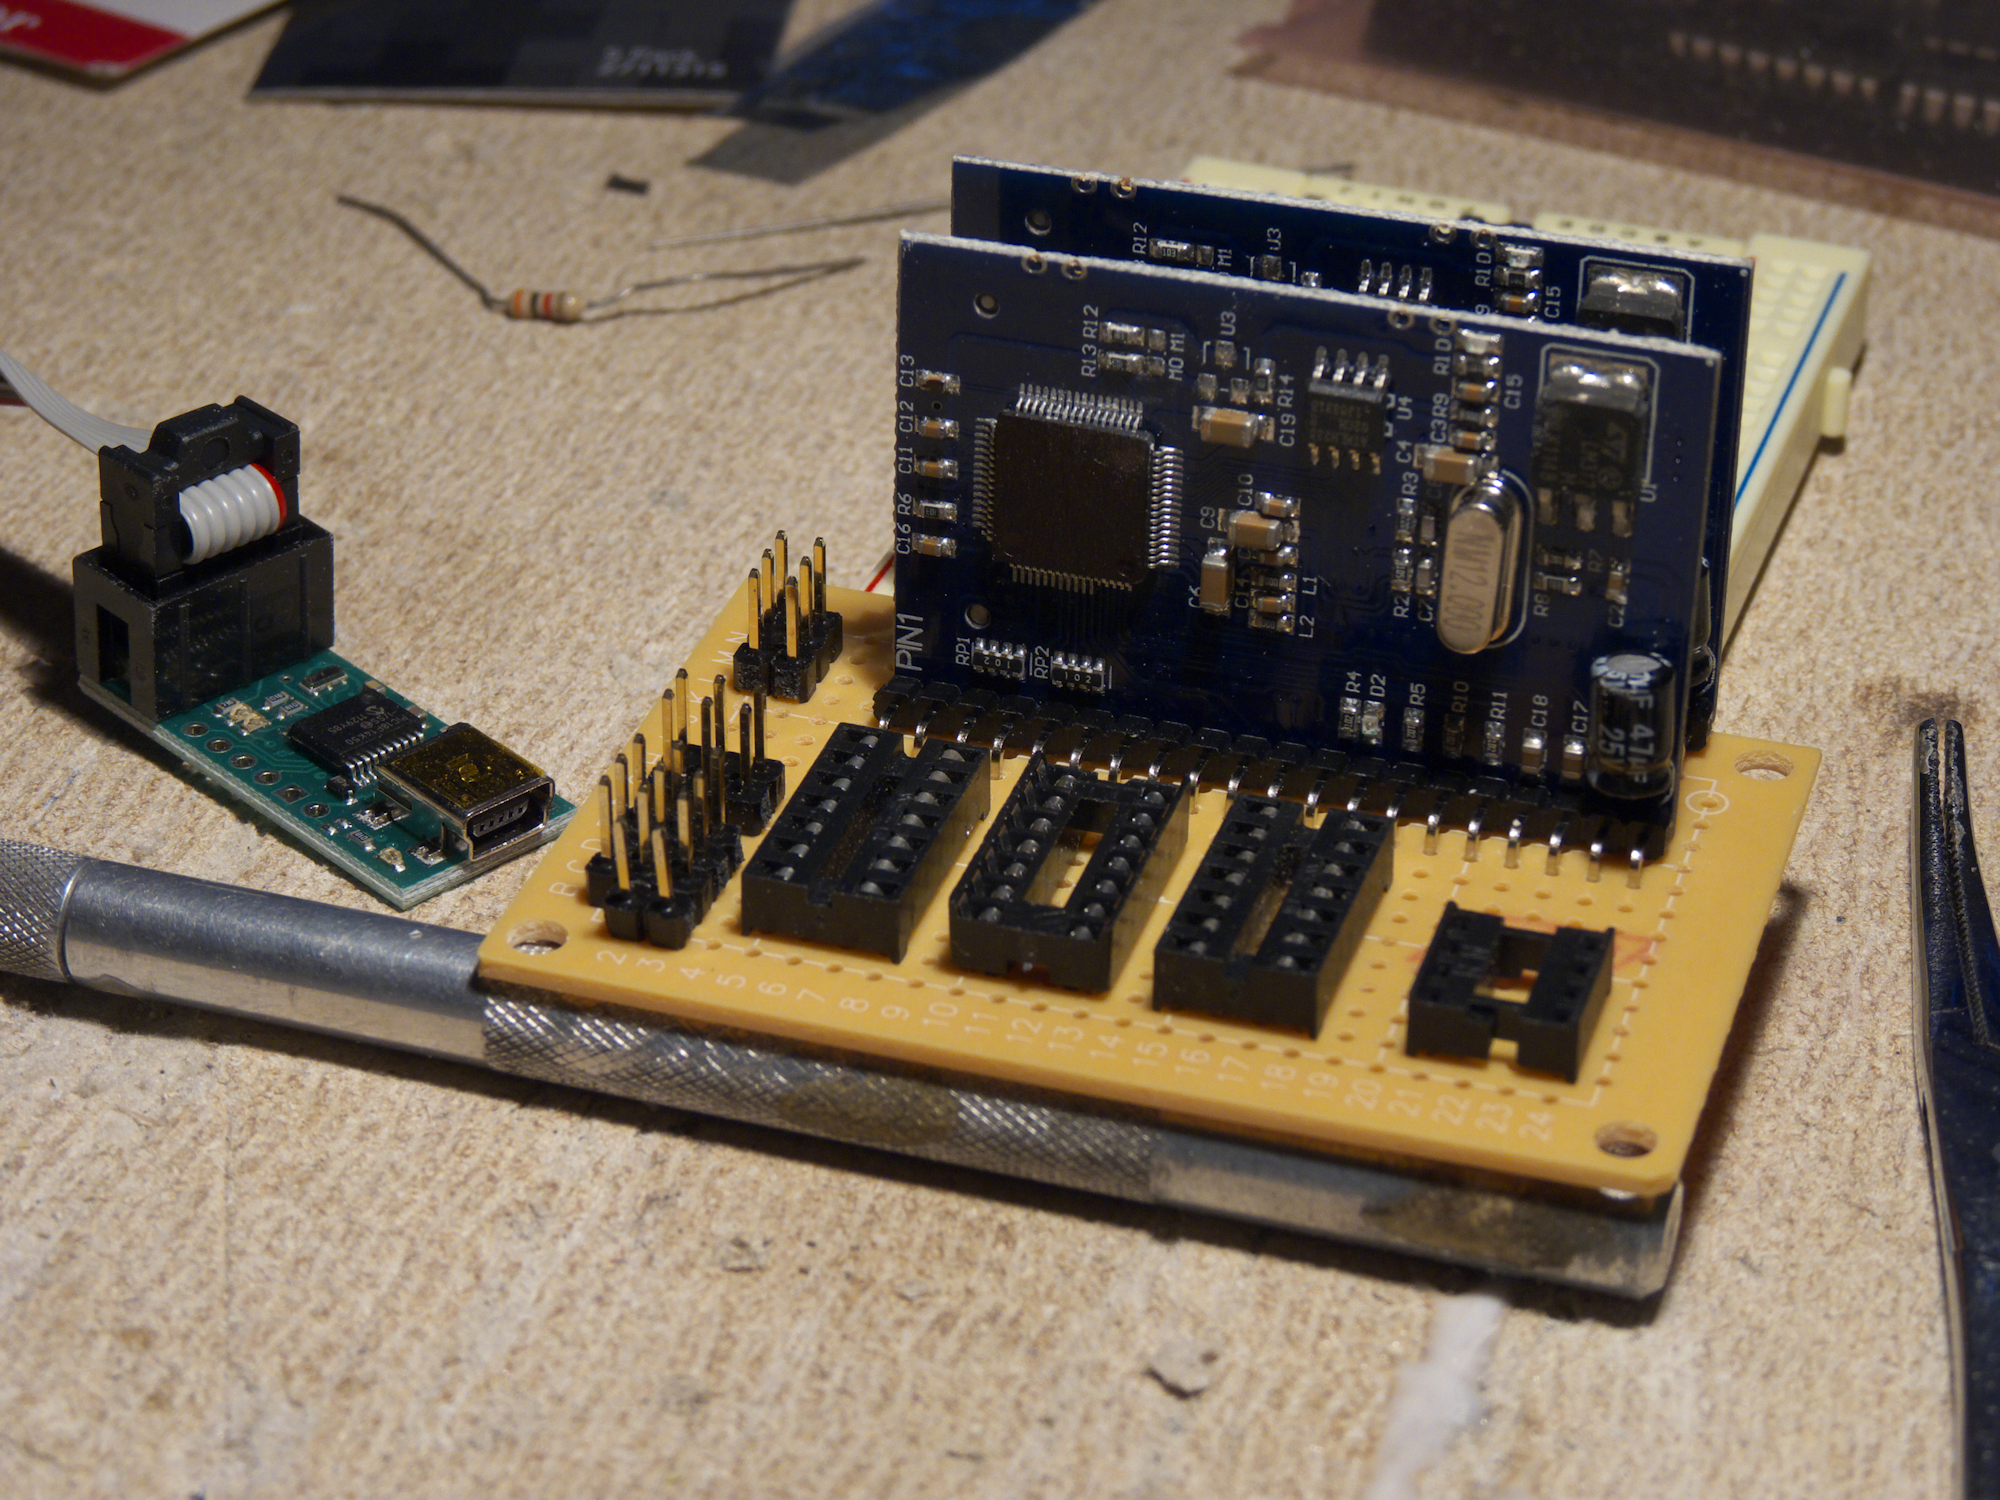
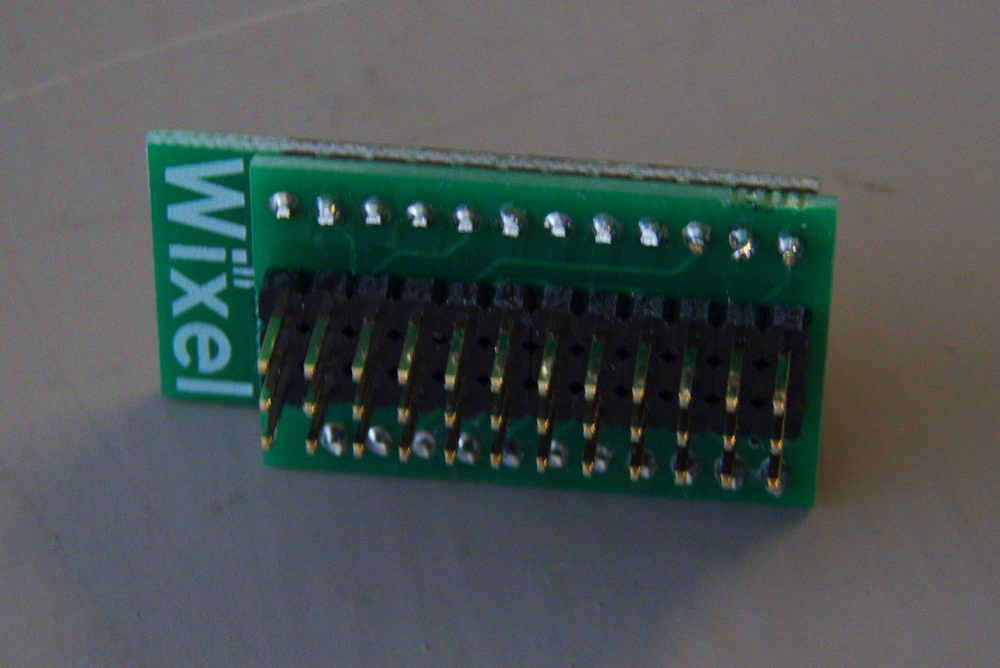
I’ve built a bunch of prototypes and the soldering is quite a pain, so I’ve designed a PCB that makes all of this easy. Solder in the wixel and a set of servo header pins, connect power and servos and it works. A complete slave.

So, I’m contemplating a run of boards, in small quantities they are about $5 a board. While the software may change over time, these will always be the standard physical platform for servo slaves.

If anyone is interested in all of this and getting a board and the current software, email me, I’ll order extra boards.

EMAIL MARTAN

I have a python class that communicates with the master and thus reads and writes the slaves. I’ve posted it’s current incarnation below, it has lots of debug info in it and is just provided so you can see where I’m going with this. Obviously this fits into my other explorations with RPi tornado web sockets and all that 😉


import serial
import time
import random

class wixelMasterController:
    def __init__(self):
        usbPort = '/dev/ttyACM0'
        self.sc = serial.Serial(usbPort, timeout=1)
        self.initializeTables()

    def initializeTables(self):
        self.masterTxTable = []				# create the transmit and
        self.masterRxTable = []				# receive tables
        for i in range(0,64):				# as lists
            self.masterTxTable.append([])
            for j in range(0,6):
                self.masterTxTable[i].append(0)
        for i in range(0,64):
            self.masterRxTable.append([])
            for j in range(0,16):
                self.masterRxTable[i].append(0)
            
    def closeMaster(self):
        self.sc.close()						# close serial port

    def setServoPosition(self, slave, servo, data):
        self.masterTxTable[slave][servo] = data
        self.sendSlaveData(slave)

    def getSlaveData(self, slave):
        datapacket = []                         # init list
        datapacket.append(chr(0x81))            # command byte, write tx table
        datapacket.append(chr(slave))           # slave to control goes here

        for d in datapacket:  	                # send command to the serial port
            self.sc.write(d)

        returndata = []                         # now read data returned by master
        for d in range(0,16):                   # for this slave
            returndata.append(self.sc.read(1))

        s = "slave: %d " % slave                # DEBUG print the data
        print s,
        sv=""
        for r in range(4,16):                   # skip the length and address
            sv+="%2x " % ord(returndata[r])       # print analog low, hi
        print sv

    def sendSlaveData(self, slave):
        datapacket = []                         # init list
        datapacket.append(chr(0x82))            # command byte, write tx table
        datapacket.append(chr(slave))           # slave to control goes here
        
        for i in range(0,6):                    # queue up the master data for tx
            db = self.masterTxTable[slave][i]
            d0 = db & 0x7f                      # data must be adj for 7 bit chars
            d1 = (db & 0x7f80) >> 7             # or reception gets confused
            datapacket.append(chr(d0)) 		# note the convolutions here?
            datapacket.append(chr(d1)) 		# don't like it but it works 

        datapacket.append(chr(0))    		# only have six servos, 12 bytes plus the command and slave
        datapacket.append(chr(0))    		#  so add last two for 16 total packet size

        for d in datapacket:    		# send them to the serial port
            self.sc.write(d)			# note that it HAS to be exactly 16 bytes total

#
#
## main ##
#
#

master = wixelMasterController()

random.seed()

while(True):
    for j in range(0, 64):
        for i in range(0, 6):
            master.setServoPosition(j, i, random.randint(950, 1000))

    time.sleep(1)
    print "*******************************"

    for j in range(0, 8):
        master.getSlaveData(j)

    for j in range(0, 64):
        for i in range(0, 6):
            master.setServoPosition(j, i, random.randint(1700, 2200))

    time.sleep(1)
    print "*******************************"

    for j in range(0, 8):
        master.getSlaveData(j)

master.closeMaster()