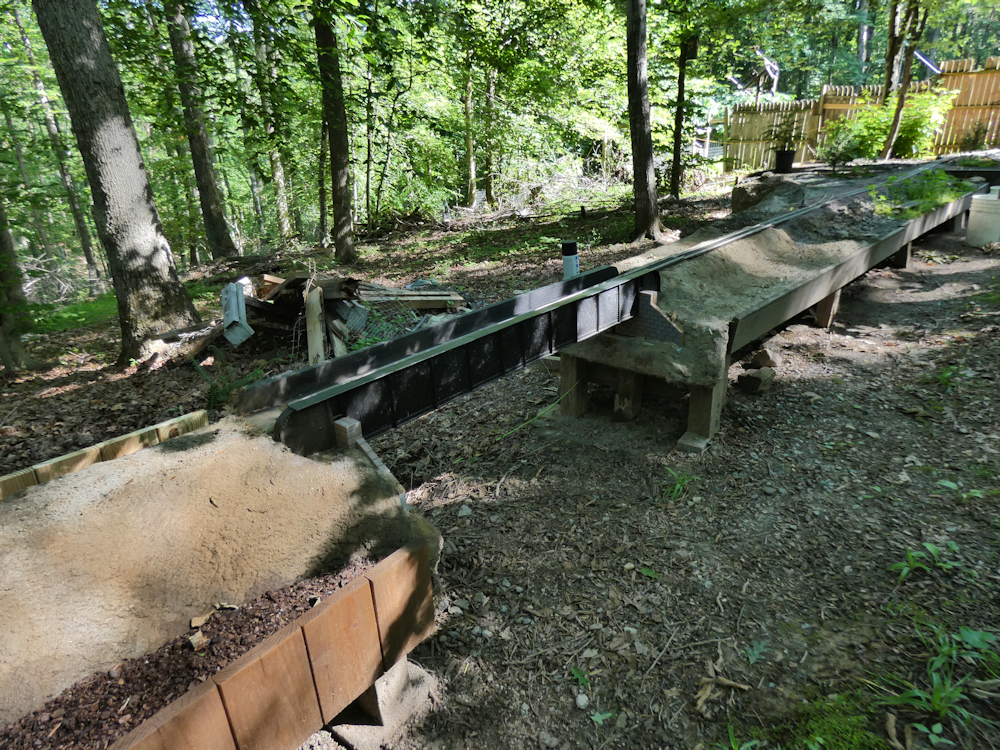
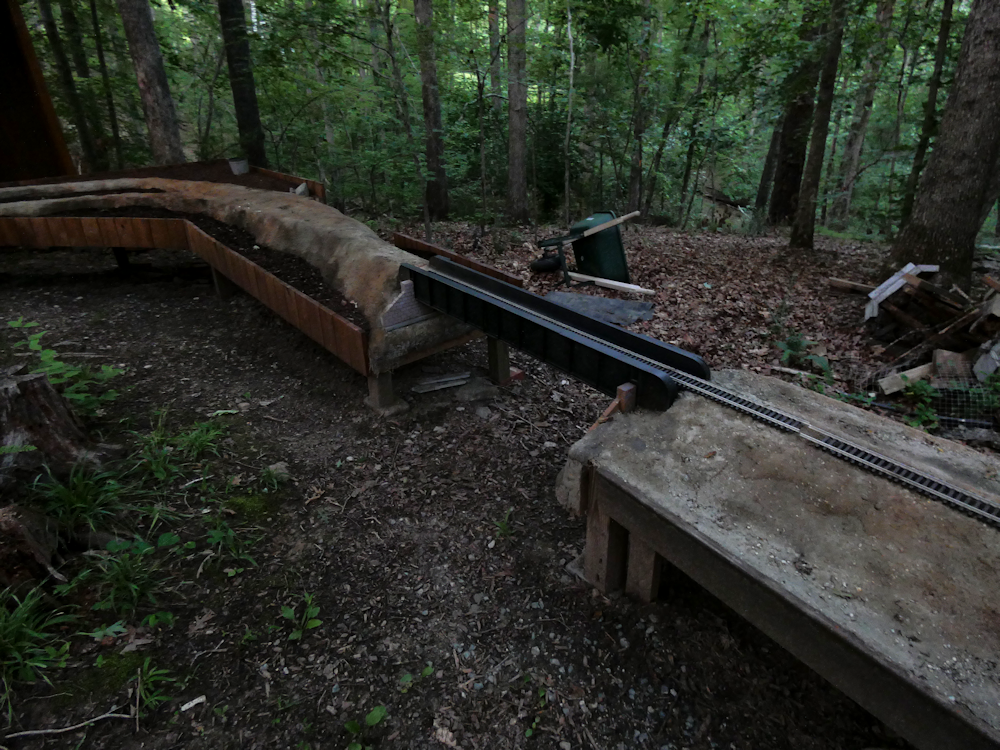
Still working on my outdoor layout, it got pretty smashed last Jan with all the snow and downed trees. Most of the major construction is done, just one or two more concrete mountain touchup work. Got a nice loop of track done so the train can make it all the way around finally. Still have some sidings and more track to lay down but it’s getting there. Perhaps by fall? But it is almost fall so hmm.
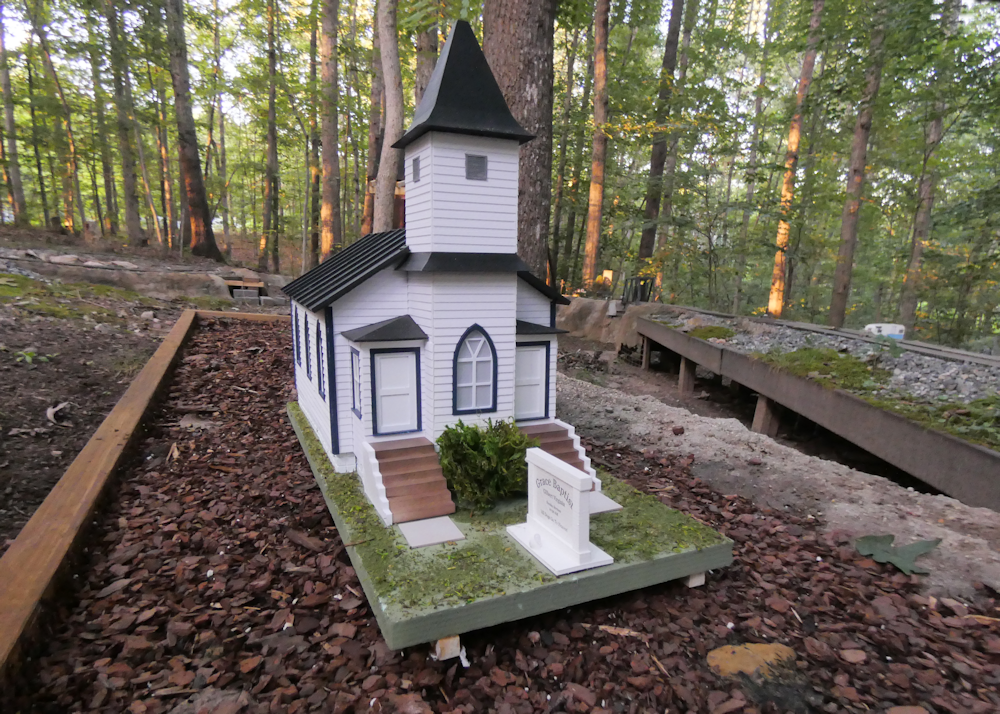
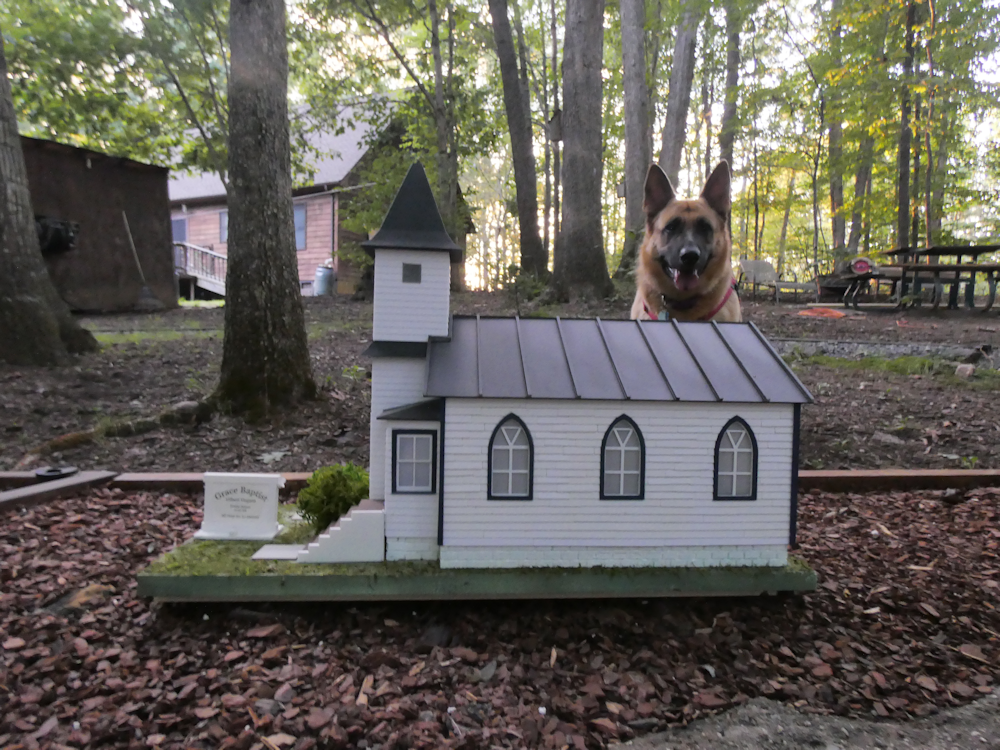
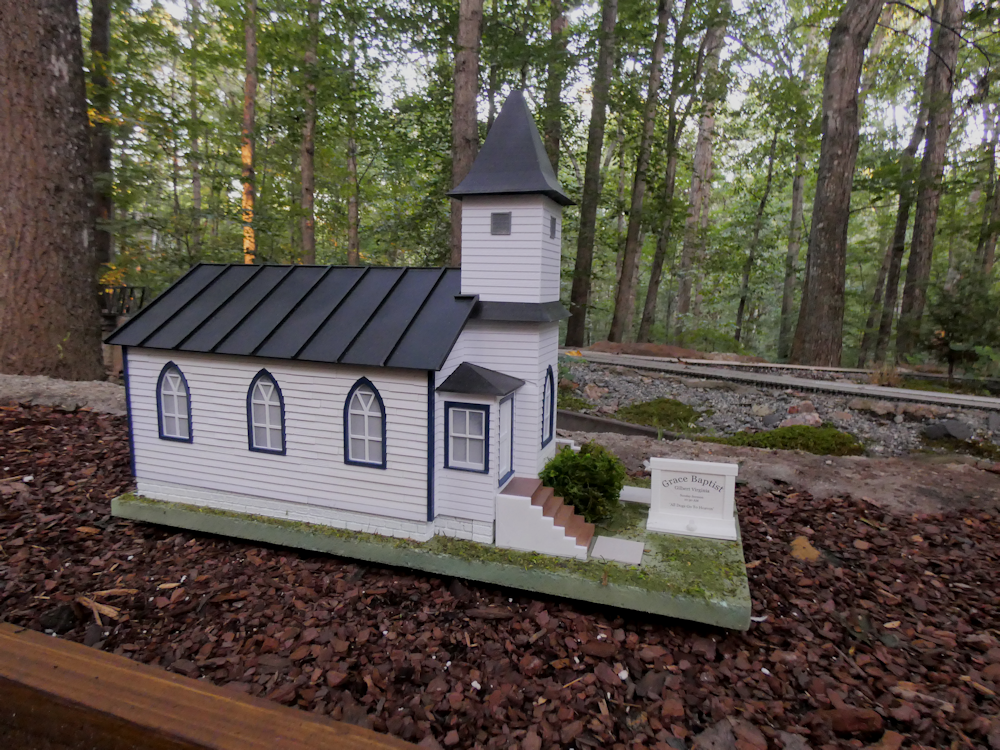
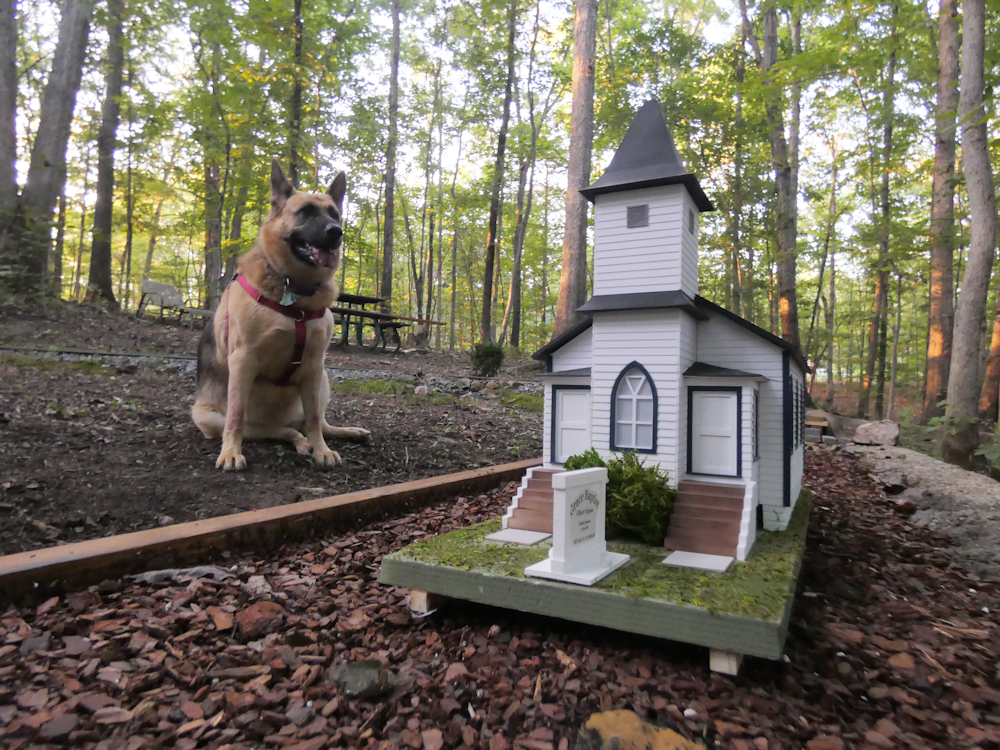
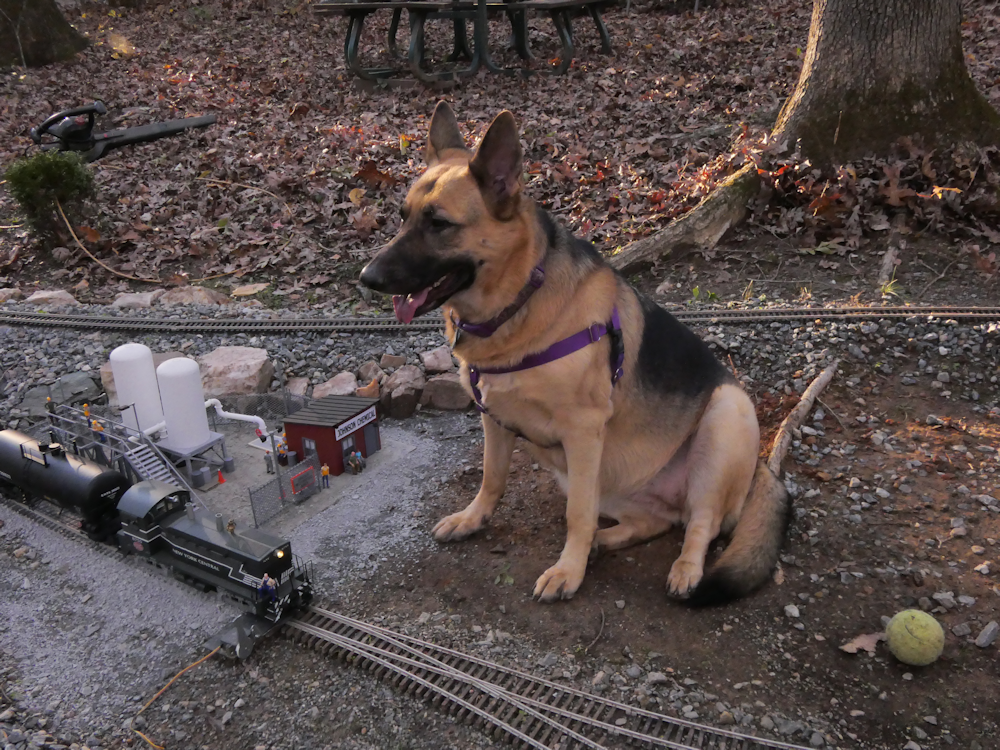
Finally finished up my Country Church. This is modeled after the one on Profit Road in Charlottesville and in real life sits near the Norfolk Southern Washington Division Track. The basic structure is styrene sheet cut out on my table top CNC machine with lots of details printed on my Creality Ender3 FDM printer. It thought it came out pretty good. It’s just sitting here at the moment, it will get a permanent place on the layout this spring. Dogzilla there keeps an eye out for squirrels.
Latest locomotive rebuild. USA Trains S4 Switcher. Completely disassembled, stripped and repainted. Threw out all the original electronics, replaced all bulbs with LEDs and installed a TSU4400 5Amp decoder. A Cytron 13A motor driver supplies DCC controlled by my Protothrottle Xbee Receiver. A Visaton full range speaker provides the sounds. I think it came out pretty well, some of the painted letters are a bit rough but for the most part I’m pretty happy with it.
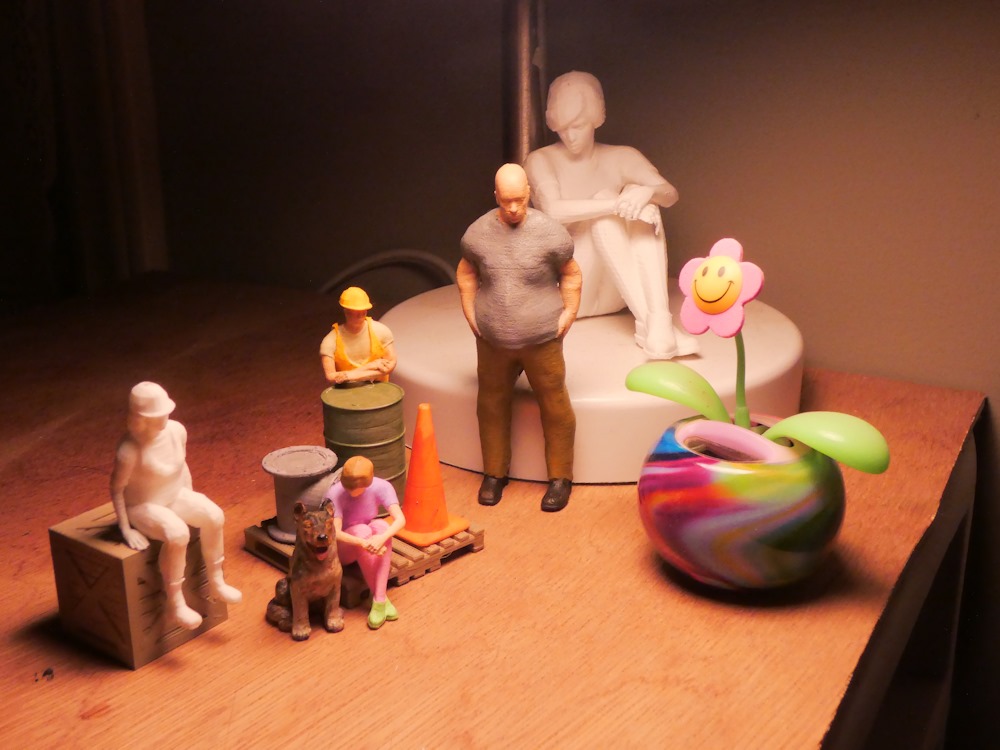
I accidentally ordered a roll of ABS filament (I had been using PLA) so that forced me to do a bit of tweaking on my 3d printer. Tried the glass bed with it, didn’t work very well. Ended up going back to the regular one but I don’t use painters tape anymore, just print right on the bed. Everything sticks fine although I’m not sure I like ABS for people. Anyhow, I have been meaning to post files of my people if anyone wants to play with them or 3d print. I use Makehuman to create them, Blender to pose em, Netfabb to seal the ‘holes’ and Cura to slice them for my Creality Ender 3. Almost all of these files are originals but I may have a few things I downloaded from thingiverse.com or something like that in there, they are just dumps of my 3d folders.
There are two zips, one has the blender files which are the ‘source’ files. You can load these into Blender and pose and sculpt them in various ways, then export them into stl or obj files for printing, that file is here:
blender.zip
The other one has already processed files, exported from blender ready to be loaded into a slicer for 3d printing. That zip is here:
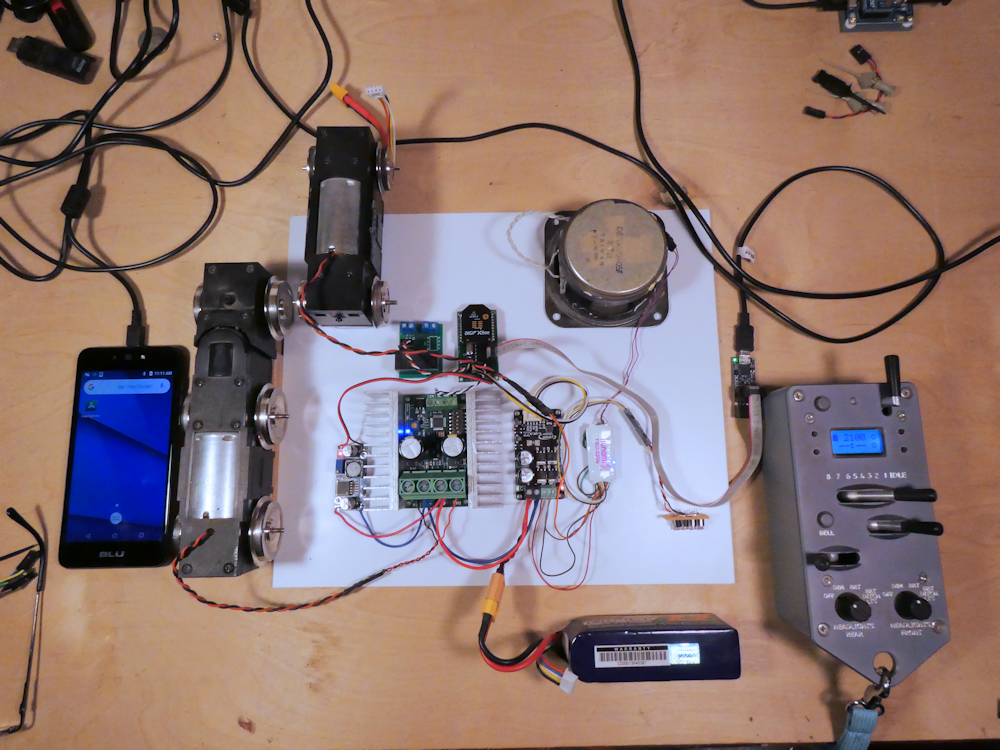
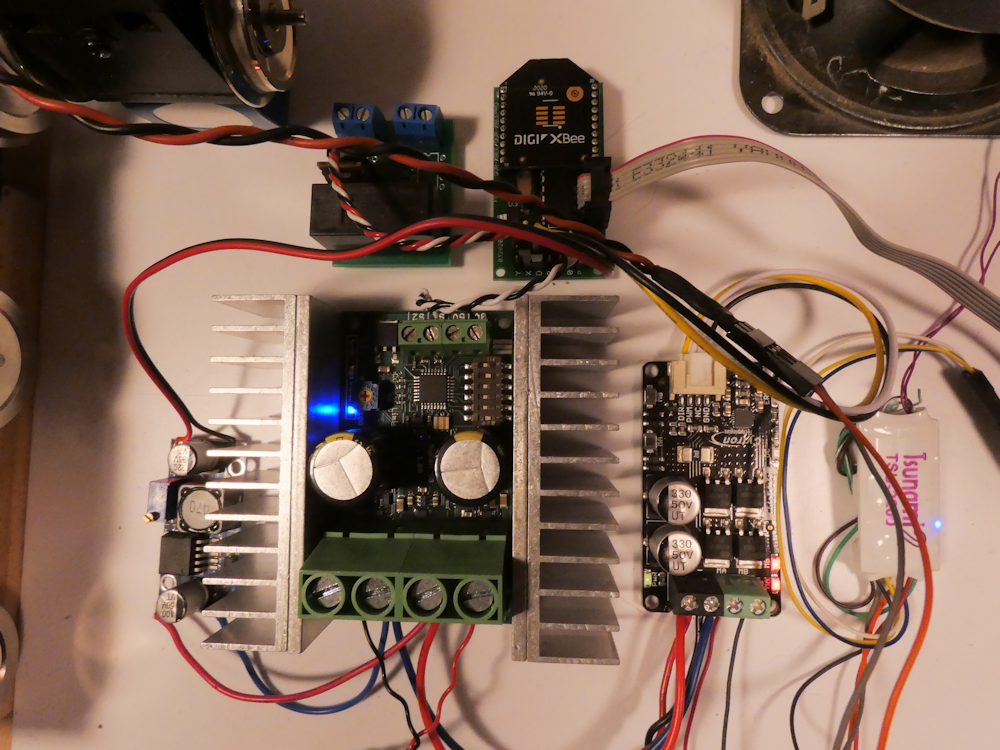
In my quest to drive ever larger locomotives, here is my latest development rig. It is designed for both very large motors and DCC. It can drive motors up to about 50A and can also supply about 8A of DCC. It consists of the Protothrottle Receiver, the Syren50 50Amp motor controller, a SoundTraxx TSU2200 DCC decoder, a Cytron Amp for the DCC, a 5v buck converter (to power the rx), a power relay and two motor trucks. One of the trucks is driven with the Syren50 and the other is hooked to the TSU2200.
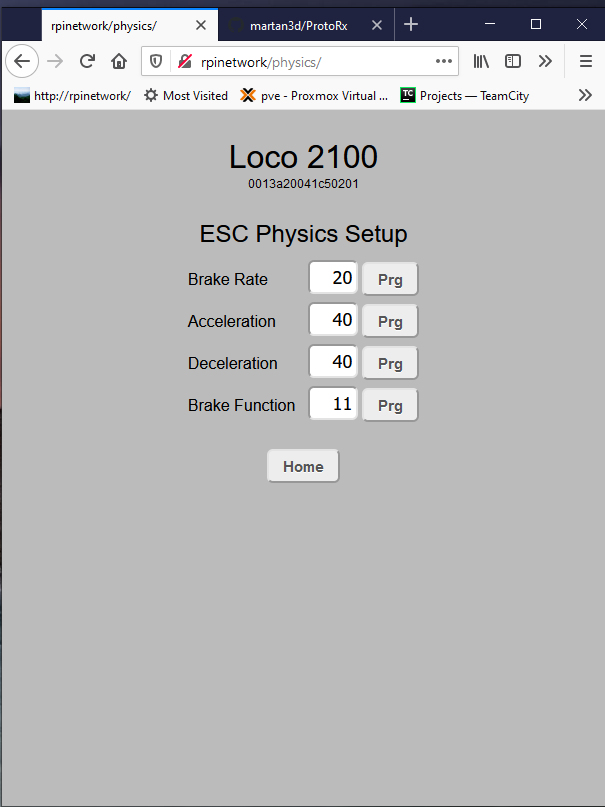
I am pretty close to a final release on this iteration. It includes a new ESC mode, PHYSICS, and four parameters for setting up acceleration/deceleration and braking with the Syren50 motor controller. The braking responds to the brake lever on the Protothrottle and has a variable rate. The brake function parameter sets which function code the brake effect reacts to. On the TSU, this is F11, so I’ve set that here to get the brake squeal sound out of the decoder.
With the exception of the Brake Function Code, all of the values are in milliseconds. These represent an increment or decrement of one throttle step every X milliseconds until it reaches the value sent by the Protothrottle. Low values closely follow the PT, larger values take more time to reach the PT value. The brake rate is similar, however it is affected by the amount of deflection of the Protothrottle’s brake lever. The more deflection, the more brake is applied.
Here is a video of it in action. Note that the acceleration/deceleration of the large motor block, tied to the Syren50, differs quite a bit from the acceleration values in the decoder controlled motor truck. In actual use, these would be ‘tweaked’ so the DCC and ESC rates match.
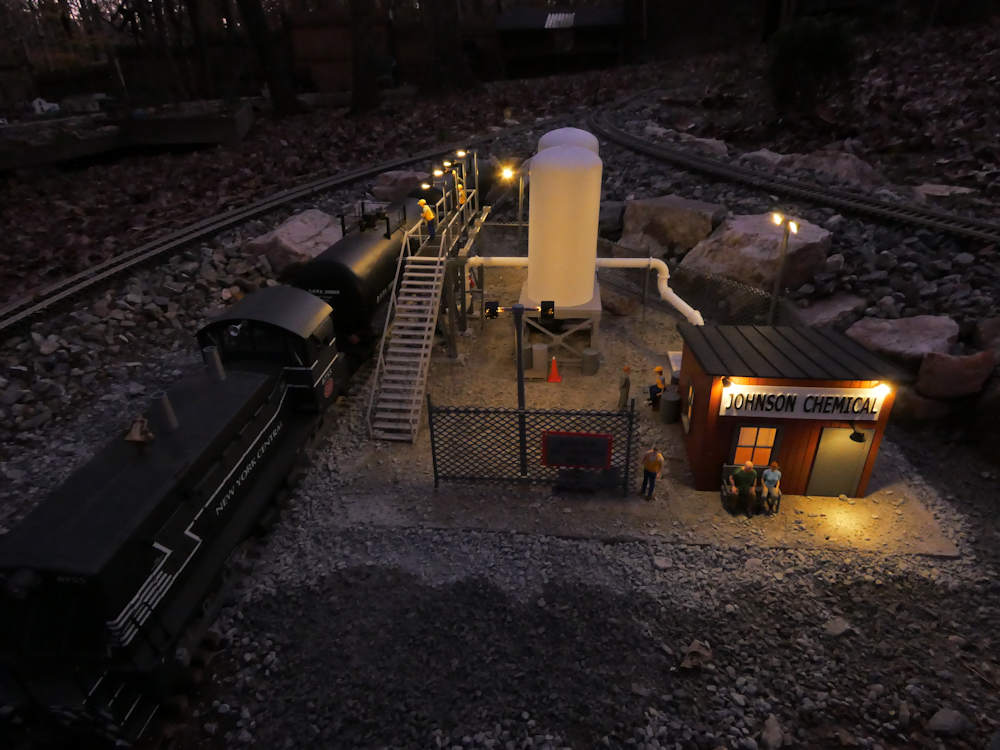
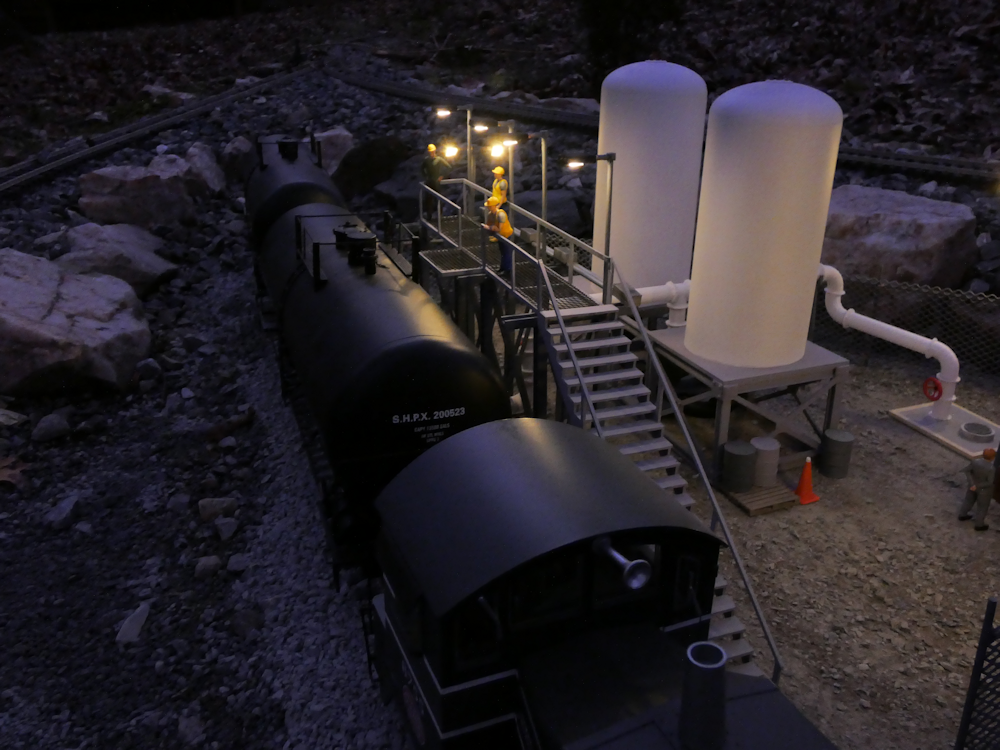
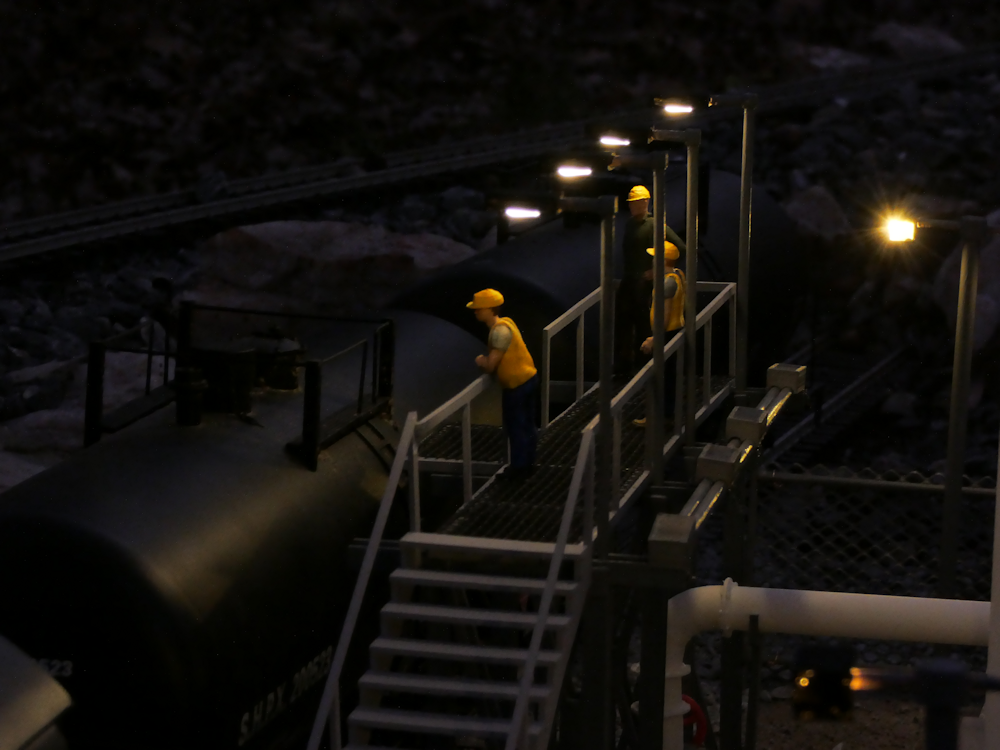
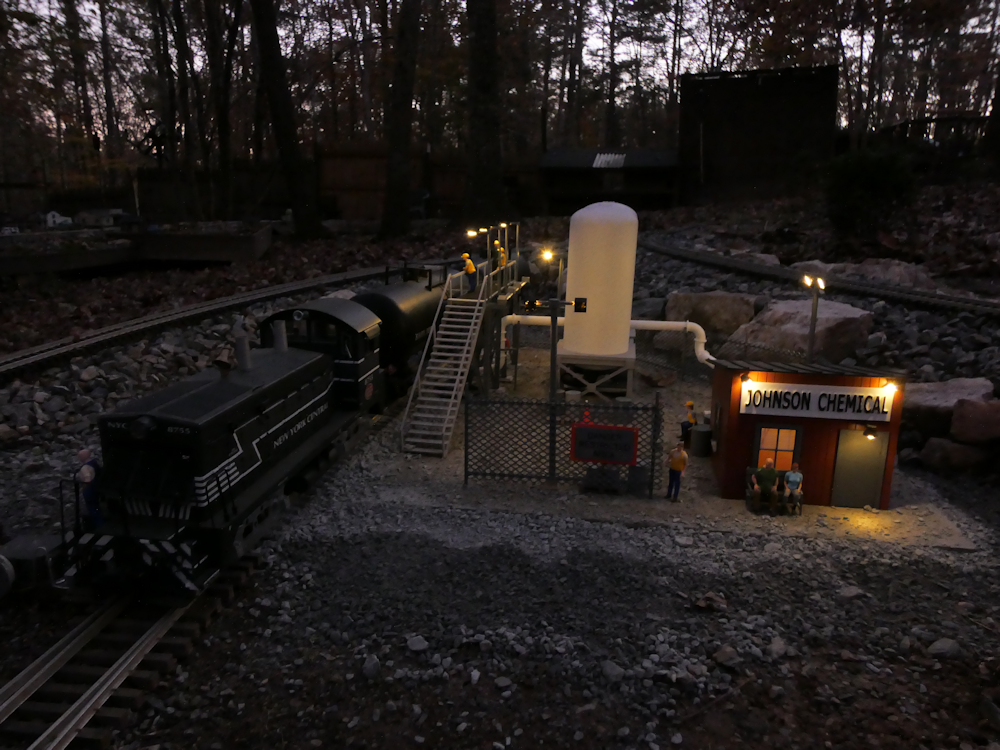
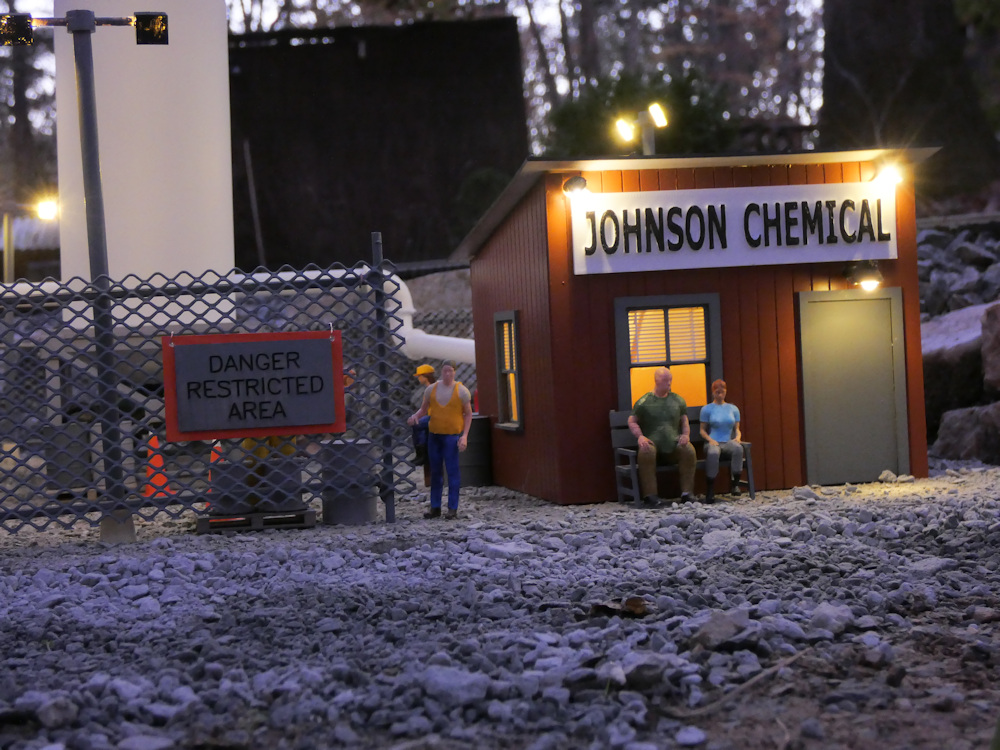
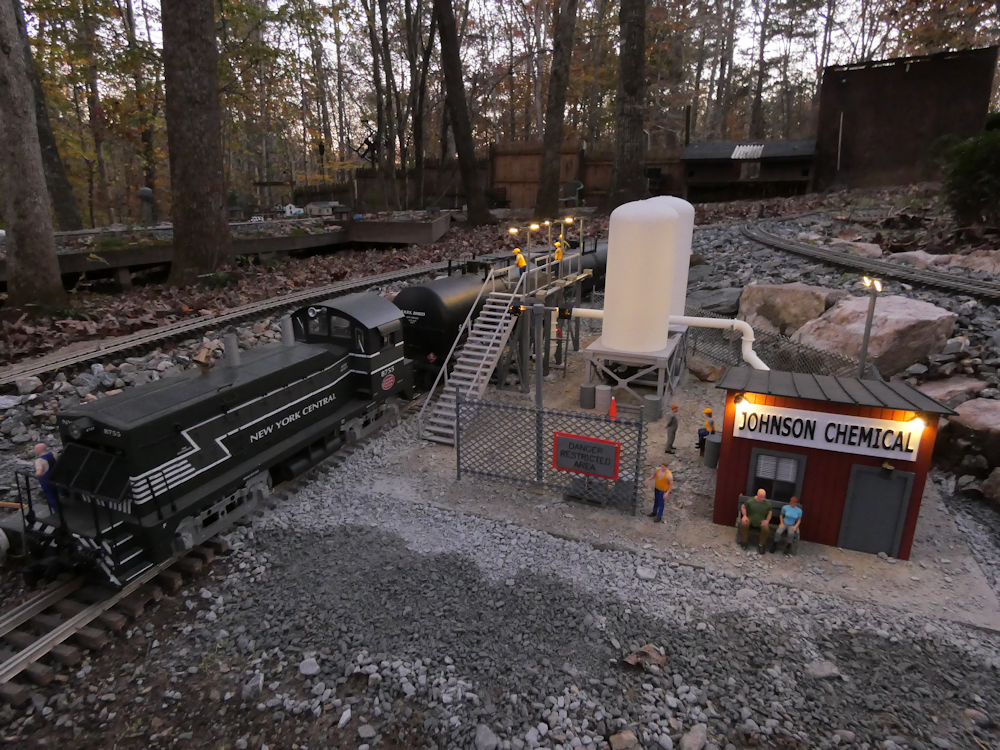
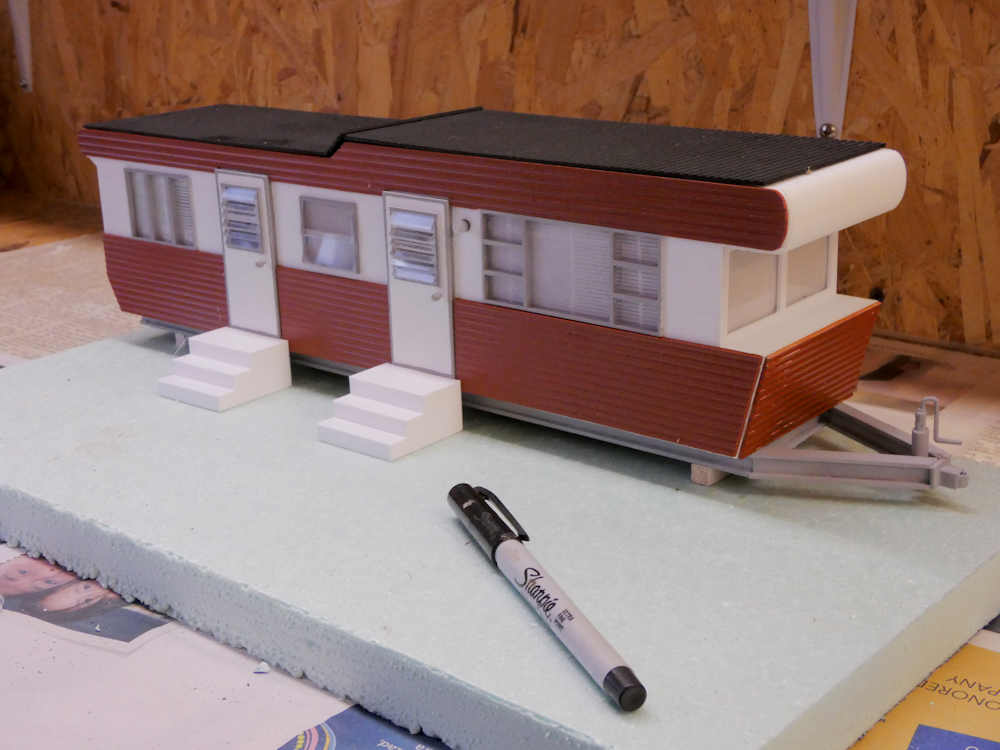
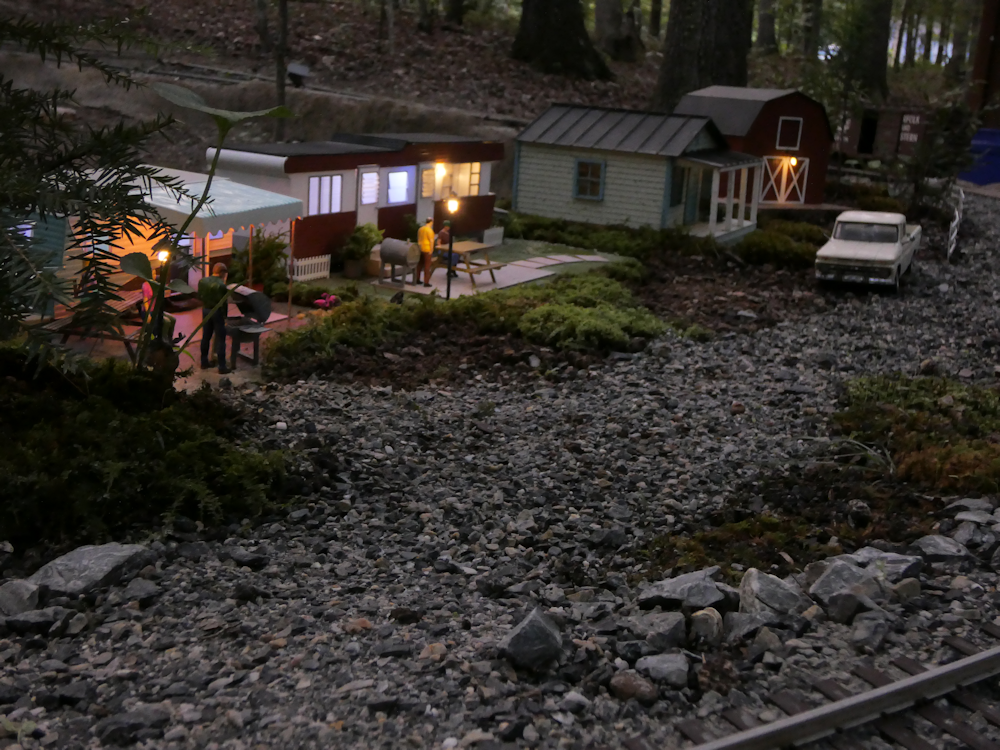
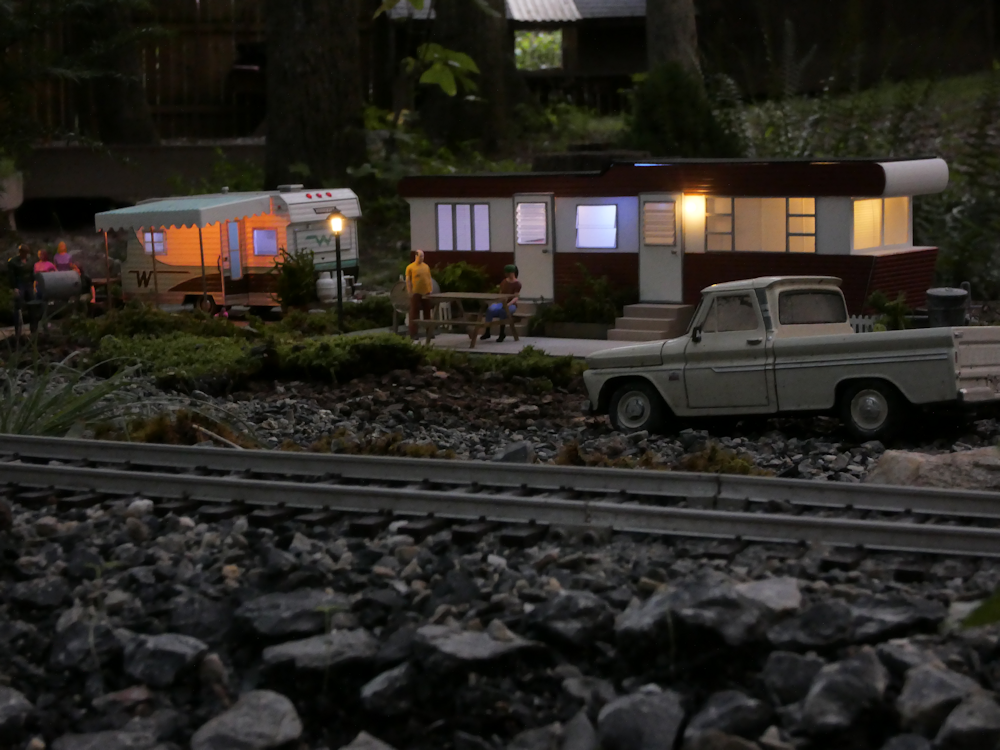
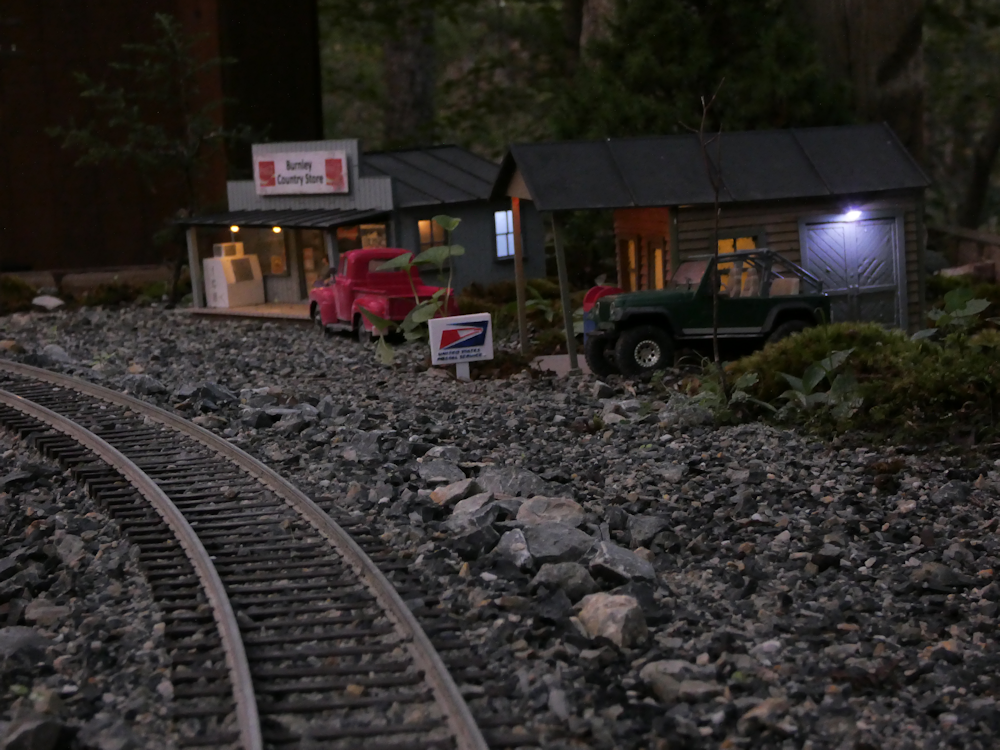
I’ve been building out my little towns with houses, stores and trailer parks, but I had nowhere to actually switch loads. So I came up with this little industry. It’s some sort of chemical company, I’m not sure what but it was in a good place to spot a couple of tank cars. I plan on a small office building/factory about where the dog is sitting, but have not gotten that far yet.
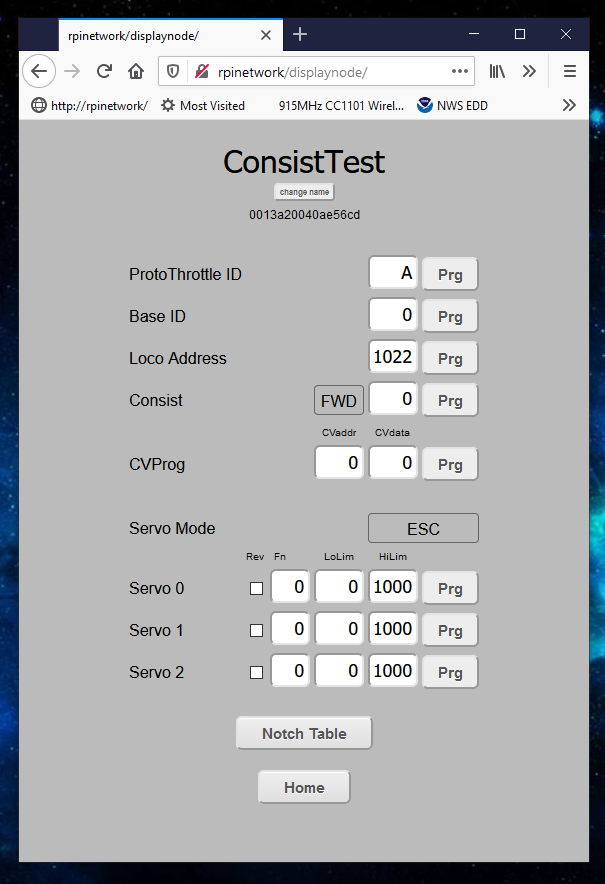
I managed to get a bit of time between the extremes of heavy rain and oppressive heat we are having to do some real-world testing of my new consist feature. I’ve had a basic consist setup in the receiver for a long time now and if you run similar locomotives with the same decoder setup, it worked ok.
However I have two very similar looking but different Chessie locomotives. An Aristocraft U25B with a Soundtraxx TSU4400 DCC decoder and a USA Trains GP38 with a TCSWow 501. The Aristo U25 ran about twice the speed of the GP38 at the same PT notch setting. Lots of grinding and coupler pops, these two were not happy together.
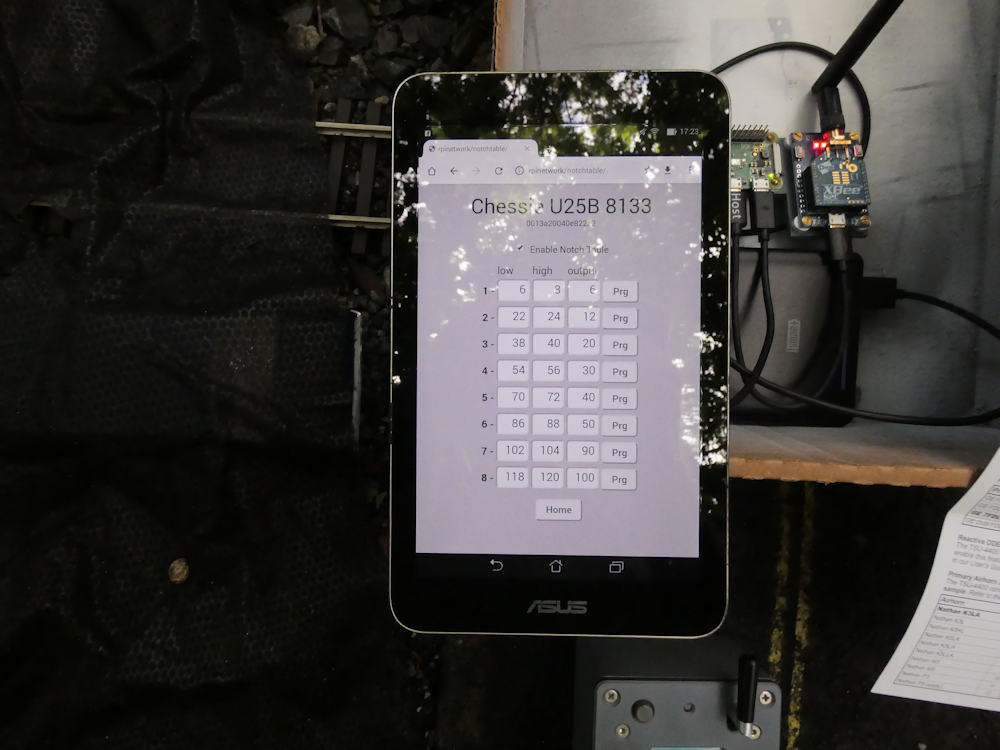
I did not like the idea of custom speed tables and all that CV programming etc, so I decided to just intercept the notch/throttle and apply a custom value. Hence this feature.
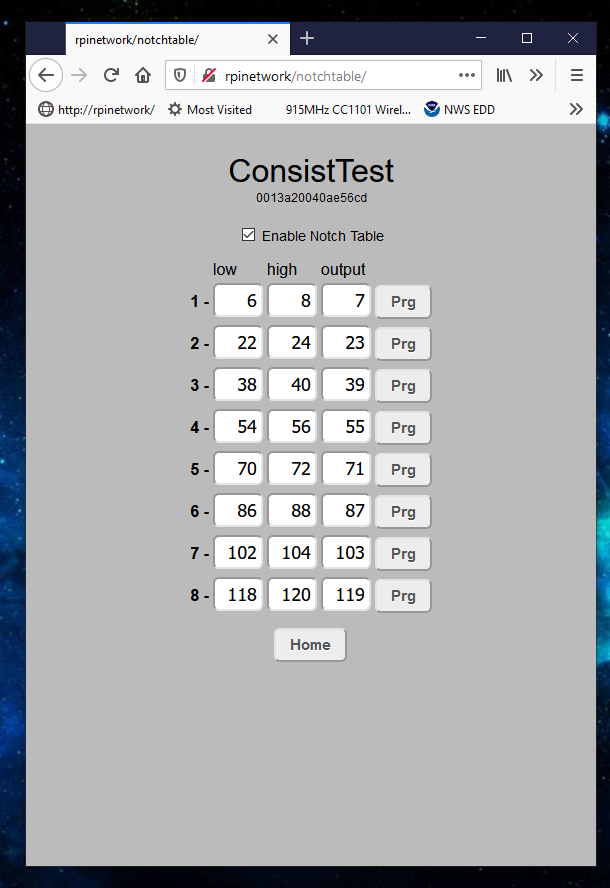
This adds a table in the receiver that is enabled if the loco is a consist ‘slave’. You can program each of the notches as sent by the Protothrottle to a unique throttle value that is sent to the decoder. This lets you more closely match up speeds.
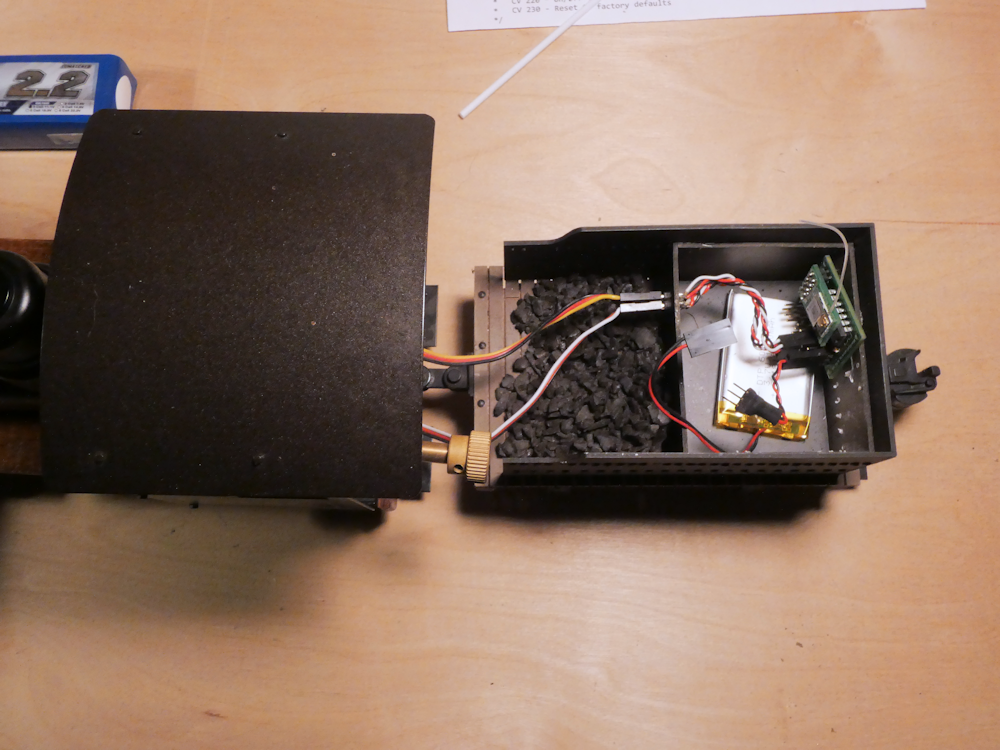
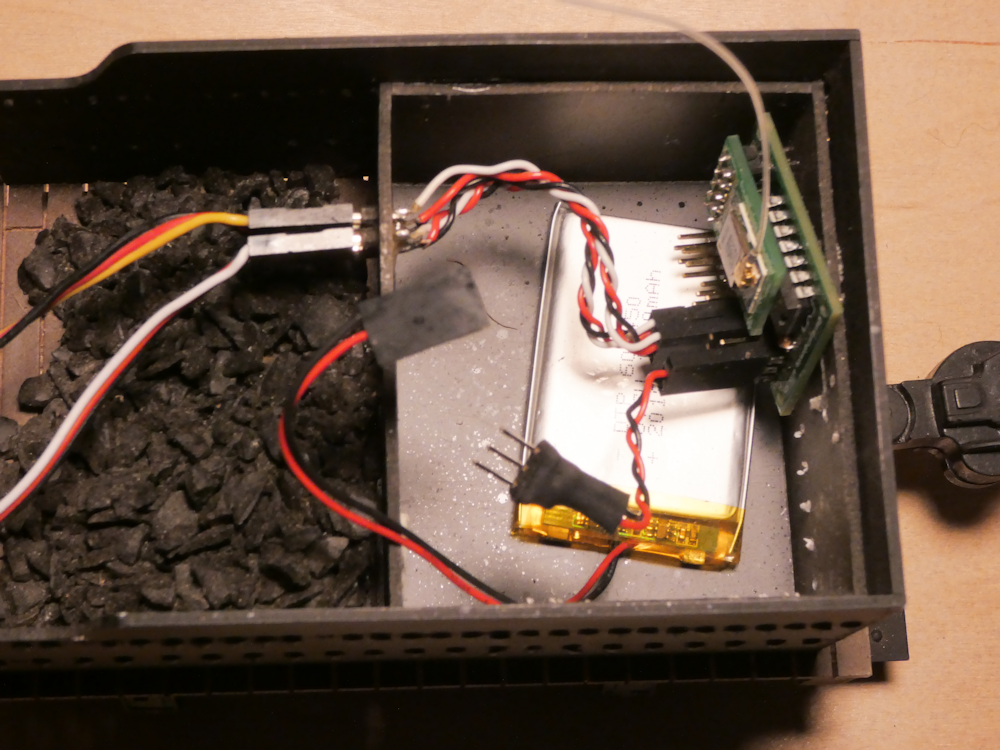
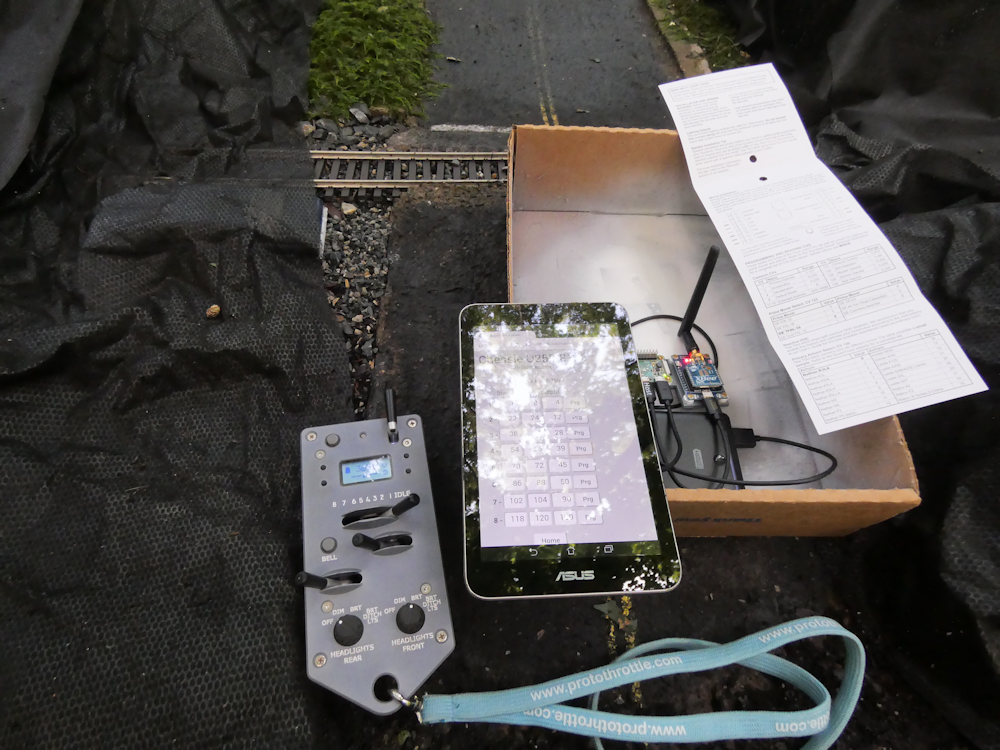
Above is my outside setup with a closer shot below. Yes, it’s in a cardboard box but it keeps the electronics in one place and is very portable! (the fold out card is for the TSU4400 CVs, I can’t ever remember them) I use one of those phone external batteries to power my programmer and a Asus 7 inch tablet to run the web app. Works well and the parameters are updated in real time.
In the following video I’m just letting the locomotives chase each other to test on how closely they are matched up. This also required that I change a few CVs in the U25B to dial in the acceleration and deceleration to more closely match the GP38. The GP38 is the lead locomotive on the left.
In the next video, I’ve built up a fairly heavy train. The tank cars are particularly chunky. I still have some small tweaking to do at notch 4, the U25B does not have quite enough deceleration dialed in. But it works well and looks pretty good. I see I will need one more programming aspect- a filter on the slave so that the bell and horn can be turned off. Right now, that passes through so I get two bells and two horns, sounds a bit weird.
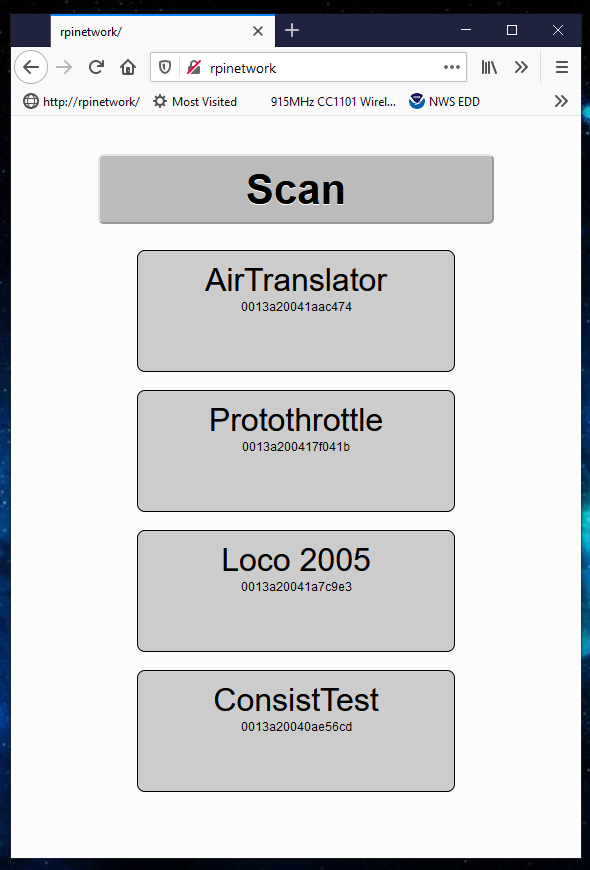
Below are some screen shots of the web app interface. For the most part, the cosmetics are the same but I have refactored the Xbee message passing and screen refresh code to make it more robust. I’ve also added a way to set the Node Identifier in the Xbee, this is a 20 character ASCII string that I use as the locomotive name. I used it to set the name of the Protothrottle to ‘Protothrottle’ since it comes from the factory as a blank. I would like to access more of the PT innards, particularly the configurations so I can save and load them on the computer, but that doesn’t seem to work in the current PT firmware? I would hack on the PT code but I like having a unit I ‘use’ and a ‘development unit’ to experiment with but I don’t have a spare $500 right now. Anyhow, note that these are screen grabs from my testing inside on the bench, not the above outside consist testing. For reference, the name at the top is the Xbee Node ID and the number under that is the mac address of that Xbee.
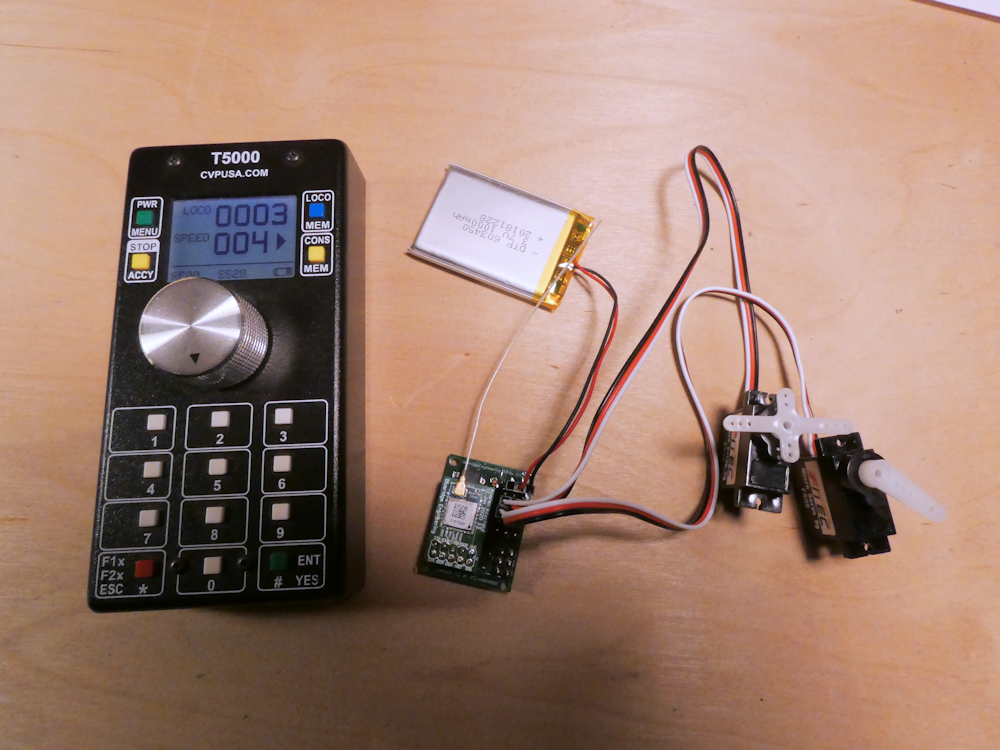
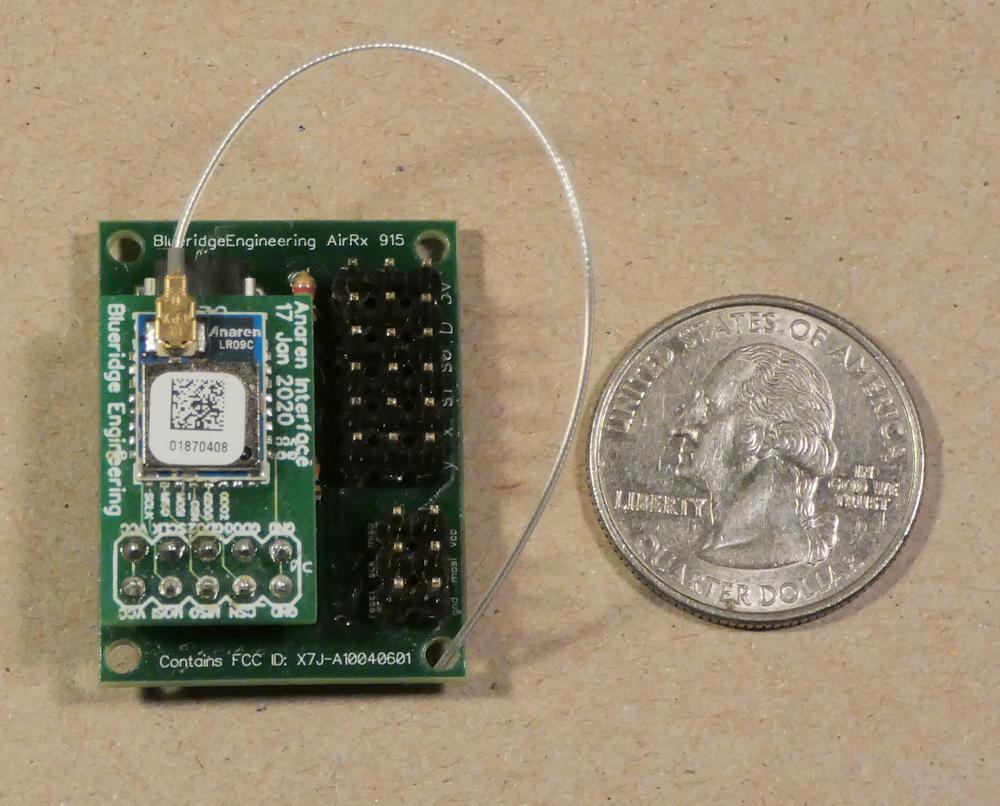
The production boards are in test now. They came out very well. Very small and compact, no errors or blemishes. As mentioned in previous posts, this is an Airwire Compatible Receiver that uses the Anaren Chipset and matching antenna. It gets a good 100ft range and can be programmed to listen to any of the 16 Airwire Channels.
The second picture above is my Protothrottle to Airwire interface. This is still a quasi-pre-production sort of board as I don’t have the funds to re-design it at the moment but the circuit design and firmware are in good shape. It has some expensive parts but I’m getting very good results so far and have enough boards to build six or so.
The idea here is to get everything to play together. The Protothrottle on dedicated receiver boards and also allowing Airwire compatible boards to work as well. I’d add Revo to this but I don’t have one and they seem to be quite proprietary so would have to be reverse-engineered.
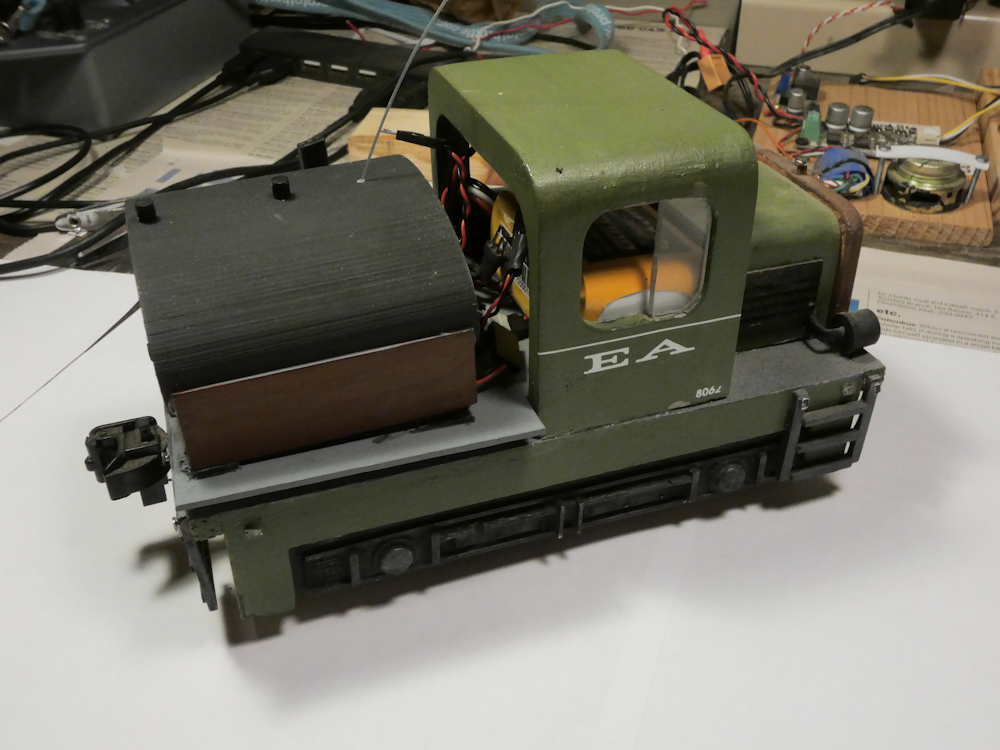
Anyhow, as far as the AirRx is concerned, in addition to passing the DCC signal from the Airwire T5000 (or my Translator) out to a power amp, it can also control two servos and two digital outputs. In the photos above, I don’t use DCC, instead I have it configured to use the servo output to drive a Pololu electronic speed controller (ESC). I have also configured one of the digital outputs to control a relay for the lights. Everything is mounted in a 3D printed ‘oil tank’ on my home made critter thing for testing.