I’ve since replaced the maestro servo controller with a Wixel wireless module, more here
I have also developed a complete application for wireless servo control using the Pololu Wixel and the Raspberry Pi as a web server. You can find details of that HERE
Summer 2014: I’ve since abandoned the Wixel in favor of the Xbee series 1 running 802.15.4 wireless networking. It has a much better range (300ft/100meters), far more flexibility and is FCC approved out of the box. I’ve constructed an Ardunio compatible board and have several libraries and source code you can check out at controlwidgets.com
____________________________________________________________________________________________________________
I moved my somewhat lengthy post about the Raspberry Pi and realtime control of the Pololu Micro Maestro Servo controller to this page. I’ve also updated it since it was a little terse and some of the components you needed to run this were not specifically mentioned.
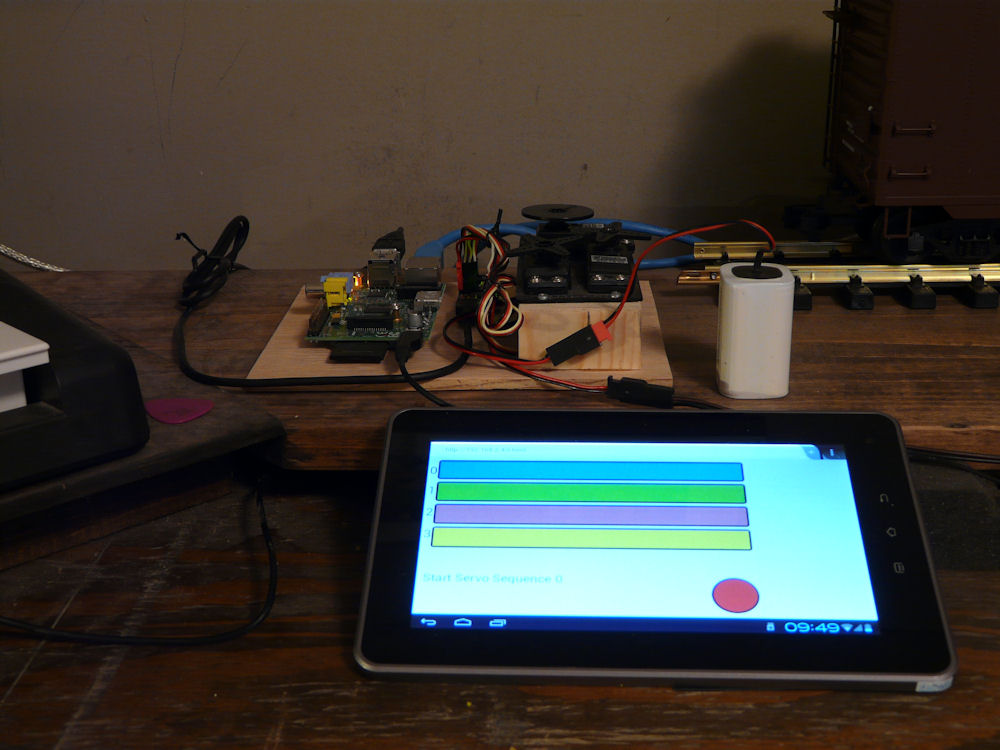
First, the general idea is that the Raspberry Pi is set up as a web server using lighthttpd. (you could probably also use apache if you wanted) A browser (I use firefox) running on a generic Android Tablet is used to access a web page on the RPi web server. The web page has some javascript in it that opens a web socket. Through this web socket data from the touch screen on the tablet is sent to the Tornado Web Server. Tornado loads the python Servo class when a connection is started and x,y commands from the tablet are sent to the servo class with some simple javascript.
So, as I said, there are a few components that need to be setup on your RPi for all of this to work. I’m running mine remotely, it sits on my small network with no display, keyboard or mouse attached. Here is a diagram of my setup:

A very typical, minimalistic home network. The DSL modem does the DHCP and the switch is a simple eight port thing I got from a big box store. There are four devices on the network, a Win7 box, a Ubuntu PC, the Raspberry Pi and an old wireless router for Wifi.
To set up your RPi for remote access, here is a post on how to install SSH – Setting up Remote SSH
For the web server go here- Set up lighttpd web server. Both of these posts reference two really excellent tutorials by Simon the Pi Man. I encourage you to check out his site for other RPi goodies, he has some great stuff there.
Downloads and reference
Here is the Tornado Home I did the manual installation.
An excellent Cookbook/Tutorial for setting up and running Tornado is here: Websockets-Server
Some more good web sockets info is here: More on WebSockets Info
HTML5 JavaScript Library: http://kineticjs.com/
Ok. Armed with all that info, you should be able to use the following code to tie this all together and make it work. Essentially, after installing everything, you take the html file, the server.py file and the kineticJS.js file and place them in the /var/www folder. Then you run server.py which just enters an infinte loop looking for commands that come in.
As mentioned before, this is a minimalistic bit of code that needs to be fleshed out to use in any sort of ‘production’ situation, but it’s enough to get the basics. The data moves from the touch commands on the tablet to the Rpi via the web socket, then out to the pololu interface which sends the pulses to the servo.
If you have questions or comments, you can email me at MartinSant
Here is the servocontrol.py module, this gives access to the Pololu Micro Maestro Servo Controller
import serial
import time

class ServoController:
    def __init__(self):
        usbPort = '/dev/ttyACM0'
        self.sc = serial.Serial(usbPort, timeout=1)

    def closeServo(self):
        self.sc.close()

    def setAngle(self, n, angle):
        if angle > 180 or angle <0:
           angle=90
        byteone=int(254*angle/180)
        bud=chr(0xFF)+chr(n)+chr(byteone)
        self.sc.write(bud)

    def setPosition(self, servo, position):
        position = position * 4
        poslo = (position & 0x7f)
        poshi = (position >> 7) & 0x7f
        chan  = servo &0x7f
        data =  chr(0xaa) + chr(0x0c) + chr(0x04) + chr(chan) + chr(poslo) + chr(poshi)
        self.sc.write(data)

    def getPosition(self, servo):
        chan  = servo &0x7f
        data =  chr(0xaa) + chr(0x0c) + chr(0x10) + chr(chan)
        self.sc.write(data)
        w1 = ord(self.sc.read())
        w2 = ord(self.sc.read())
        return w1, w2

    def getErrors(self):
        data =  chr(0xaa) + chr(0x0c) + chr(0x21)
        self.sc.write(data)
        w1 = ord(self.sc.read())
        w2 = ord(self.sc.read())
        return w1, w2

    def triggerScript(self, subNumber):
        data =  chr(0xaa) + chr(0x0c) + chr(0x27) + chr(0)
        self.sc.write(data)
Here is the Tornado web server module, this runs from the command line on your RPi, it handles the web socket communications. I have this in my /var/www/ folder along with the above servocontrol.py
import tornado.httpserver
import tornado.websocket
import tornado.ioloop
import tornado.web
import servocontrol


class WSHandler(tornado.websocket.WebSocketHandler):
    def open(self):
        print 'new connection'
        self.write_message("Hello World")
        self.servos = servocontrol.ServoController()

    def on_message(self, message):
        #print 'message received %s' % message
        channel = int(message[0])
        if channel < 9:
           c = int(channel)
           value = int(message[1:])
           value = (value - 20) / 4
           self.servos.setAngle(c, value)
           #print "channel: %d angle: %d" % (c, value)
        else:
           self.servos.triggerScript(0)

    def on_close(self):
      print 'connection closed'


application = tornado.web.Application([
    (r'/ws', WSHandler),
])


if __name__ == "__main__":
    http_server = tornado.httpserver.HTTPServer(application)
    http_server.listen(8888)
    tornado.ioloop.IOLoop.instance().start()
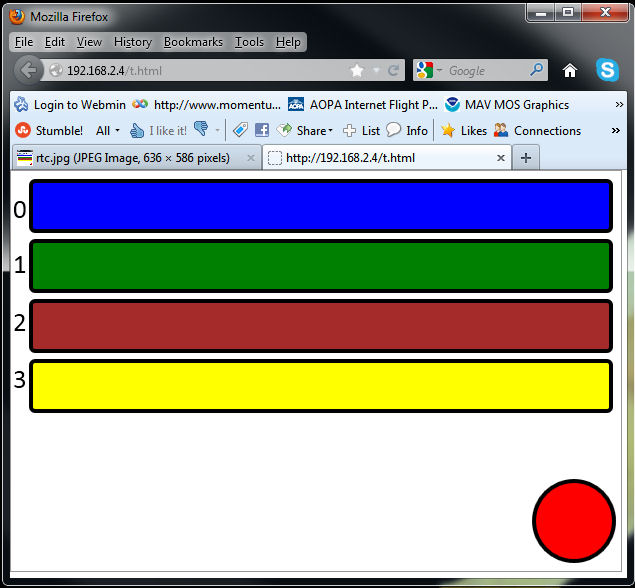
Here is the html5 code for the web page. This should look like this when it gets loaded into the browser. The servo channels are on the left, from zero to 3 and the red button is setup to trigger a script on the servo controller (see the pololu site for setting up scripts and more commands you can send to the servo, I only have a few in the servo class)
This is a screen shot from the PC, note that this html code won’t work on the PC as the color bars are triggered from the touch commands on the android screen, not mouse commands. You could modify this to work on the PC but I haven’t added that, you are welcome to add your own mods.
As far as the code below, note the ws = new WebSocket(“ws://192.168.2.4:8888/ws”); in the code, this IP will vary depending on your network setup. I also just called the following file ‘t.html’, feel free to name it whatever you want. This file also goes in the RPi /var/www folder.
<!DOCTYPE HTML>
<html>
  <head>
    <meta name="viewport" content="width=device-width, initial-scale=0.552, user-scalable=no"/>
    <style>
      body {
        margin: 0px;
        padding: 0px;
      }
      canvas {
        border: 1px solid #9C9898;
      }
    </style>
    <script src="http://www.html5canvastutorials.com/libraries/kinetic-v4.0.0.js"></script>
    <script>

      ws = new WebSocket("ws://192.168.2.4:8888/ws");

      ws.onmessage = function (message) {
        var messages = document.getElementById('messages');
        messages.innerHTML += "<br>[in] " + message.data;
      };

      sendmsg = function(chan, msg) {
        var message = chan + msg;
        ws.send(message);
      };

      function writeMessage(messageLayer, message) {
        var context = messageLayer.getContext();
        messageLayer.clear();
        context.font = "18pt Calibri";
        context.fillStyle = "black";
        context.fillText(message, 10, 325);
      }

      window.onload = function() {
        var stage = new Kinetic.Stage({
          container: "container",
          width: 610,
          height: 400
        });

        var shapesLayer  = new Kinetic.Layer();
        var textLayer    = new Kinetic.Layer();
        var messageLayer = new Kinetic.Layer();

        /////////////////////////////////////////// Channel 0
        var text0 = new Kinetic.Text(
          {
            x: 2,
            y: 30,
            text: '0',
            fontSize: 20,
            fontFamily: 'Calibri',
            textFill: 'black'
          }
        );

        var rect0 = new Kinetic.Rect(
          {
            x: 20,
            y: 10,
            width: 580,
            height: 50,
            cornerRadius: 4,
            fill: 'blue',
            stroke: 'black',
            strokeWidth: 4
          }
       );

        rect0.on("touchmove", function() {
          var touchPos = stage.getTouchPosition();
          var x = touchPos.x;
          var y = touchPos.y;
          writeMessage(messageLayer, "x: " + x + ", y: " + y);
          sendmsg("0",x)
        });

        textLayer.add(text0);
        shapesLayer.add(rect0);

        /////////////////////////////////////////// Channel 1
        var text1 = new Kinetic.Text(
          {
            x: 2,
            y: 85,
            text: '1',
            fontSize: 20,
            fontFamily: 'Calibri',
            textFill: 'black'
          }
        );

        var rect1 = new Kinetic.Rect(
          {
            x: 20,
            y: 70,
            width: 580,
            height: 50,
            cornerRadius: 4,
            fill: 'green',
            stroke: 'black',
            strokeWidth: 4
          }
       );

        rect1.on("touchmove", function() {
          var touchPos = stage.getTouchPosition();
          var x = touchPos.x;
          var y = touchPos.y;
          writeMessage(messageLayer, "x: " + x + ", y: " + y);
          sendmsg("1",x)
        });

        textLayer.add(text1);
        shapesLayer.add(rect1);

        /////////////////////////////////////////// Channel 2
        var text2 = new Kinetic.Text(
          {
            x: 2,
            y: 143,
            text: '2',
            fontSize: 20,
            fontFamily: 'Calibri',
            textFill: 'black'
          }
        );

        var rect2 = new Kinetic.Rect(
          {
            x: 20,
            y: 130,
            width: 580,
            height: 50,
            cornerRadius: 4,
            fill: 'brown',
            stroke: 'black',
            strokeWidth: 4
          }
       );

        rect2.on("touchmove", function() {
          var touchPos = stage.getTouchPosition();
          var x = touchPos.x;
          var y = touchPos.y;
          writeMessage(messageLayer, "x: " + x + ", y: " + y);
          sendmsg("2",x)
        });

        textLayer.add(text2);
        shapesLayer.add(rect2);

        /////////////////////////////////////////// Channel 3
        var text3 = new Kinetic.Text(
          {
            x: 2,
            y: 200,
            text: '3',
            fontSize: 20,
            fontFamily: 'Calibri',
            textFill: 'black'
          }
        );

        var rect3 = new Kinetic.Rect(
          {
            x: 20,
            y: 190,
            width: 580,
            height: 50,
            cornerRadius: 4,
            fill: 'yellow',
            stroke: 'black',
            strokeWidth: 4
          }
       );

        rect3.on("touchmove", function() {
          var touchPos = stage.getTouchPosition();
          var x = touchPos.x;
          var y = touchPos.y;
          writeMessage(messageLayer, "x: " + x + ", y: " + y);
          sendmsg("3",x)
        });

        textLayer.add(text3);
        shapesLayer.add(rect3);


        ///////////////////////////////////////// Circle Button

        var circle = new Kinetic.Circle({
          x: 563,
          y: 350,
          radius: 40,
          fill: "red",
          stroke: "black",
          strokeWidth: 4
        });

        circle.on("touchstart", function() {
          writeMessage(messageLayer, "Start Servo Sequence 0");
          sendmsg(9,"S")
        });

        //circle.on("touchend", function() {
        //  writeMessage(messageLayer, "");
        //  sendmsg(9,"E")
        //});

        shapesLayer.add(circle);

        stage.add(shapesLayer);
        stage.add(textLayer);
        stage.add(messageLayer);
      };

    </script>
  </head>
  <body onmousedown="return false;">
    <div id="container"></div>
  </body>
</html>

