I finally got my hands on a ESU LokSound 5XL large scale decoder for testing. So far, it works fine with my receiver, no issues.
Many people rave about the ESU Lok series, but I really don’t see why. It costs about $30 more than it’s competitors, the TCS 501 and the Soundtraxx TSU4400 and it has to be programmed before it will make any sounds. To program it you need a $130 unit unless you get it pre-programmed by the retailer. Physically, the board is ok, a bit wider than the other but not bad. The screw terminals are kinda small, I just did have a screwdriver that would fit. On the plus side, the sound is quite good, motor control is smooth and it has many many programming options. It will also support 4 servos if you need something physical.
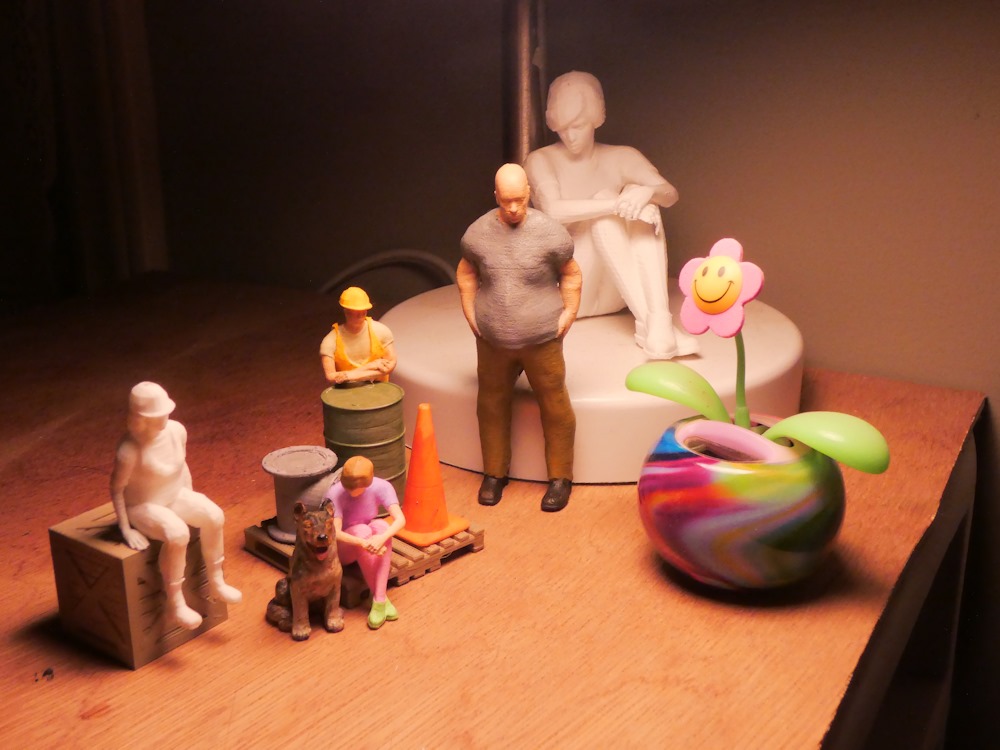
I accidentally ordered a roll of ABS filament (I had been using PLA) so that forced me to do a bit of tweaking on my 3d printer. Tried the glass bed with it, didn’t work very well. Ended up going back to the regular one but I don’t use painters tape anymore, just print right on the bed. Everything sticks fine although I’m not sure I like ABS for people. Anyhow, I have been meaning to post files of my people if anyone wants to play with them or 3d print. I use Makehuman to create them, Blender to pose em, Netfabb to seal the ‘holes’ and Cura to slice them for my Creality Ender 3. Almost all of these files are originals but I may have a few things I downloaded from thingiverse.com or something like that in there, they are just dumps of my 3d folders.
There are two zips, one has the blender files which are the ‘source’ files. You can load these into Blender and pose and sculpt them in various ways, then export them into stl or obj files for printing, that file is here:
blender.zip
The other one has already processed files, exported from blender ready to be loaded into a slicer for 3d printing. That zip is here:
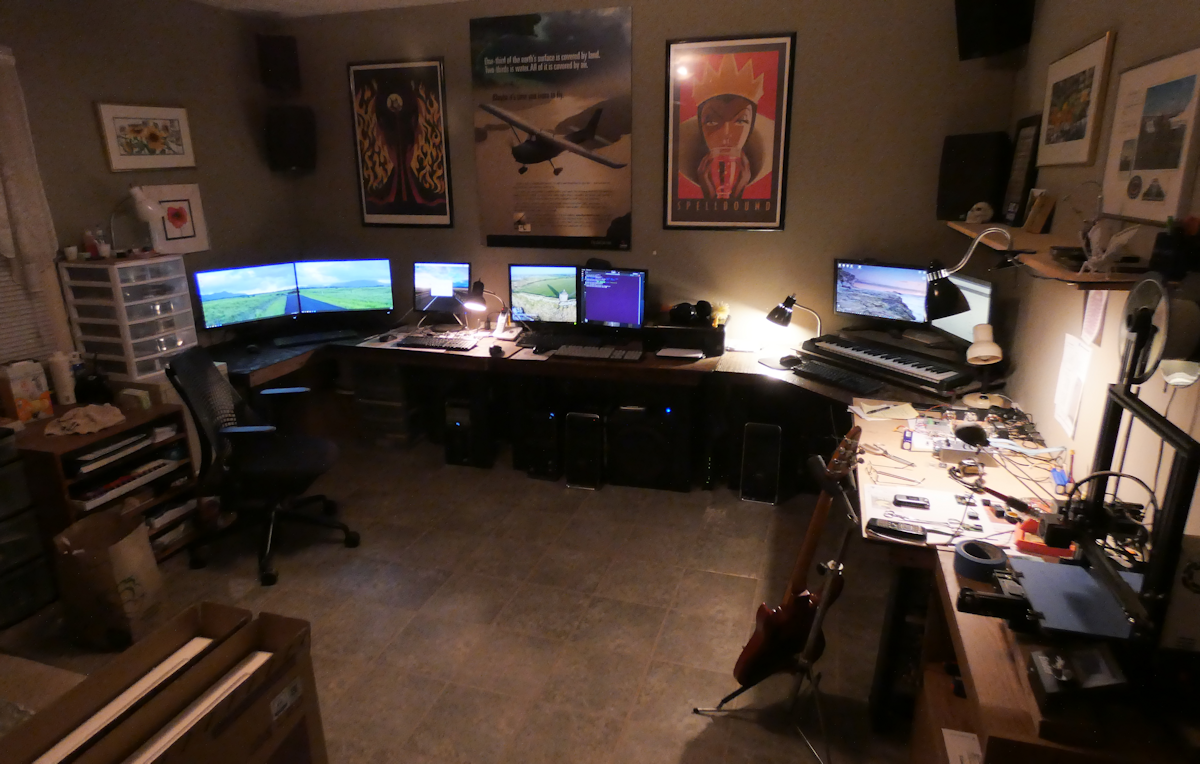
My current setup. Left to right. CHG computer, RaspberryPi development, ProxMox VE (repurposed PowerEdge), Windows 10 Fileserver, Ubuntu/Ansible box, printer, Windows 10 main machine, Solder/Lab area for model train controls, Ender3 3D printer.
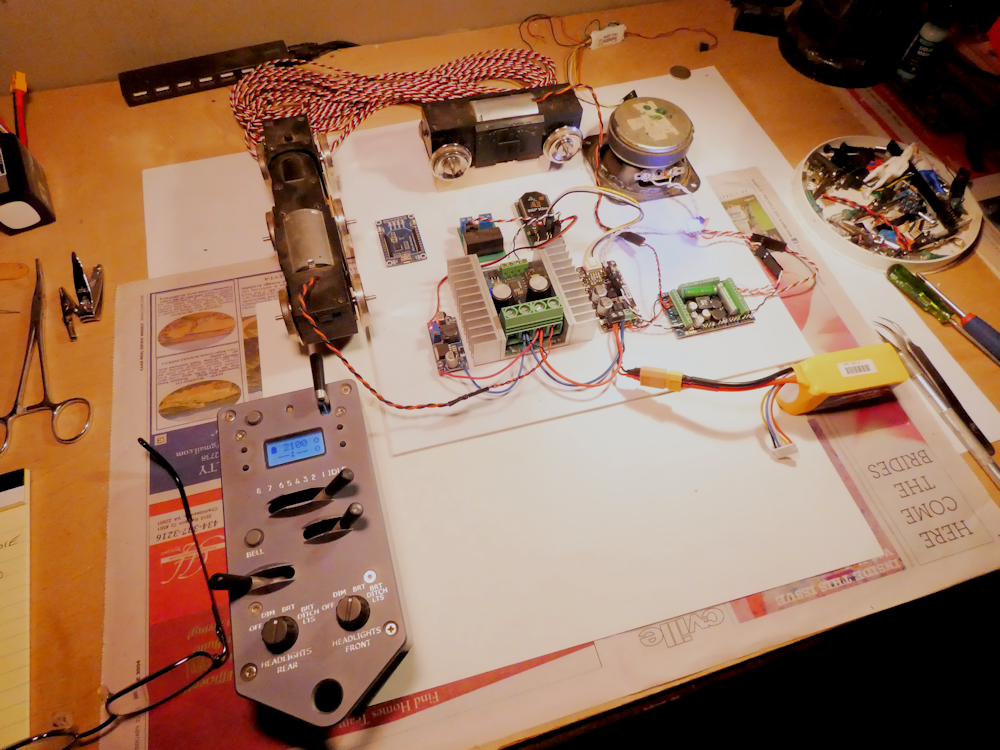
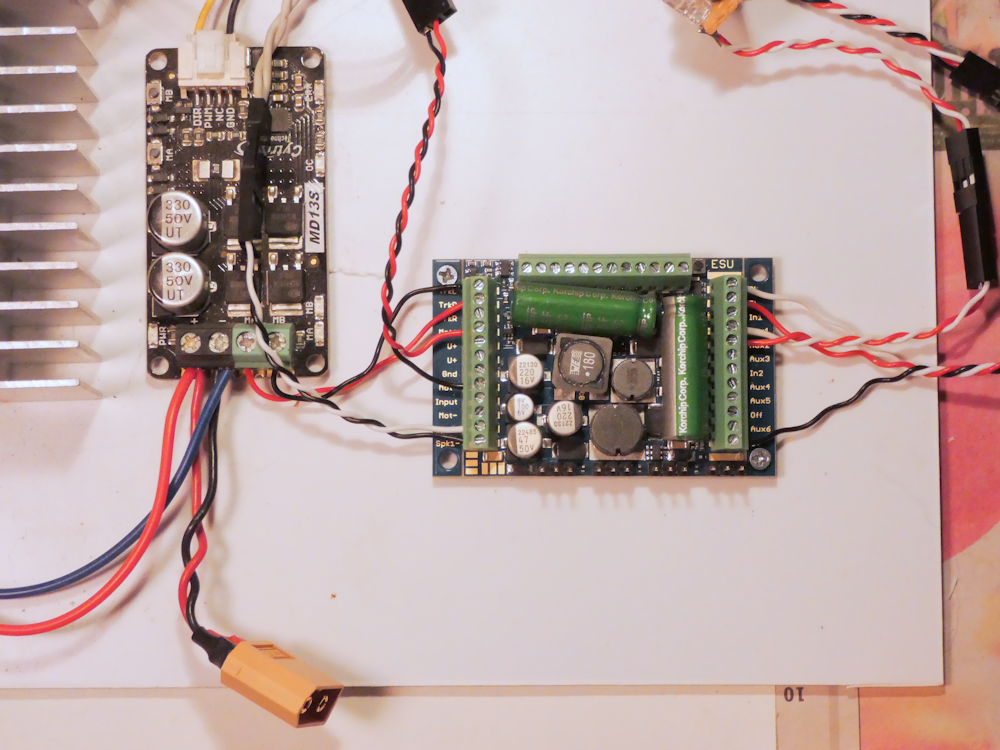
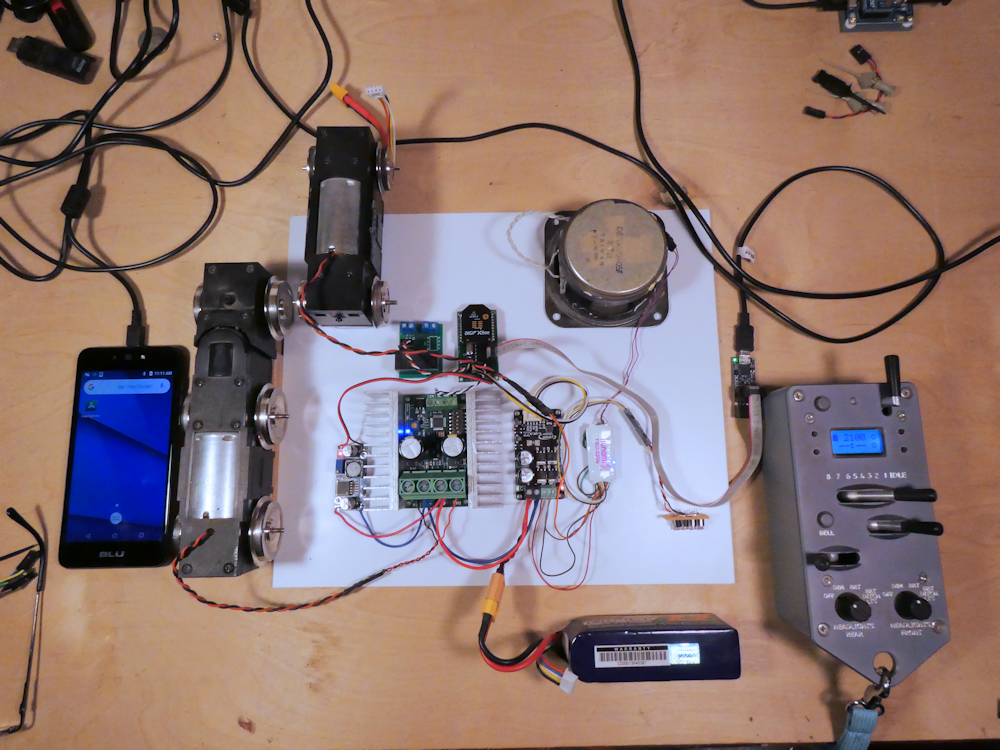
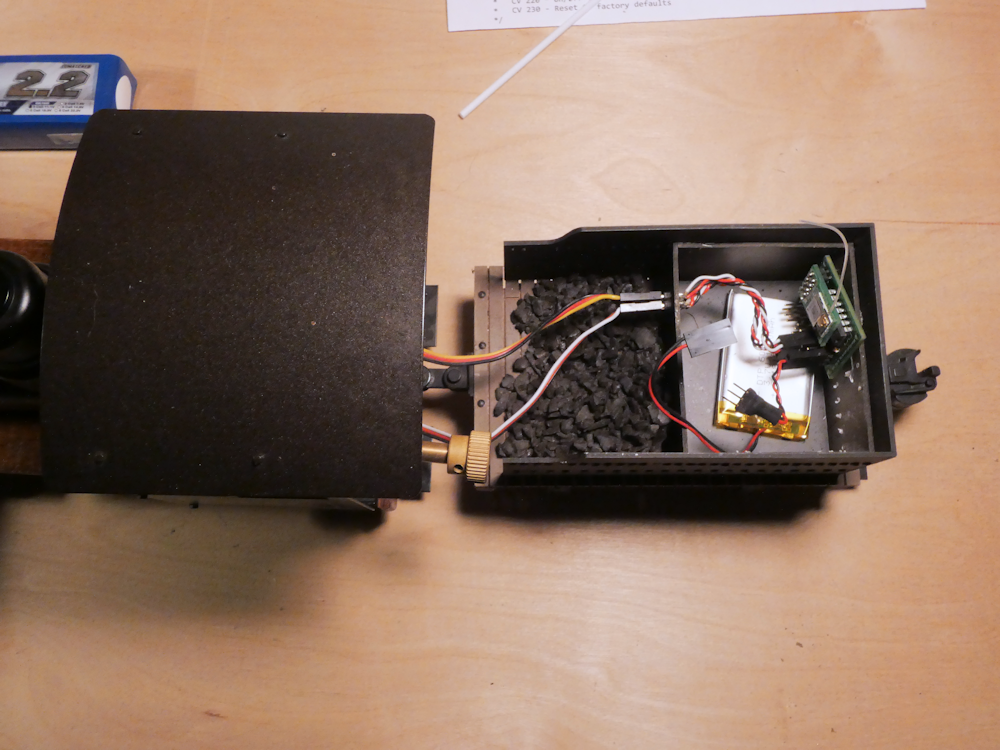
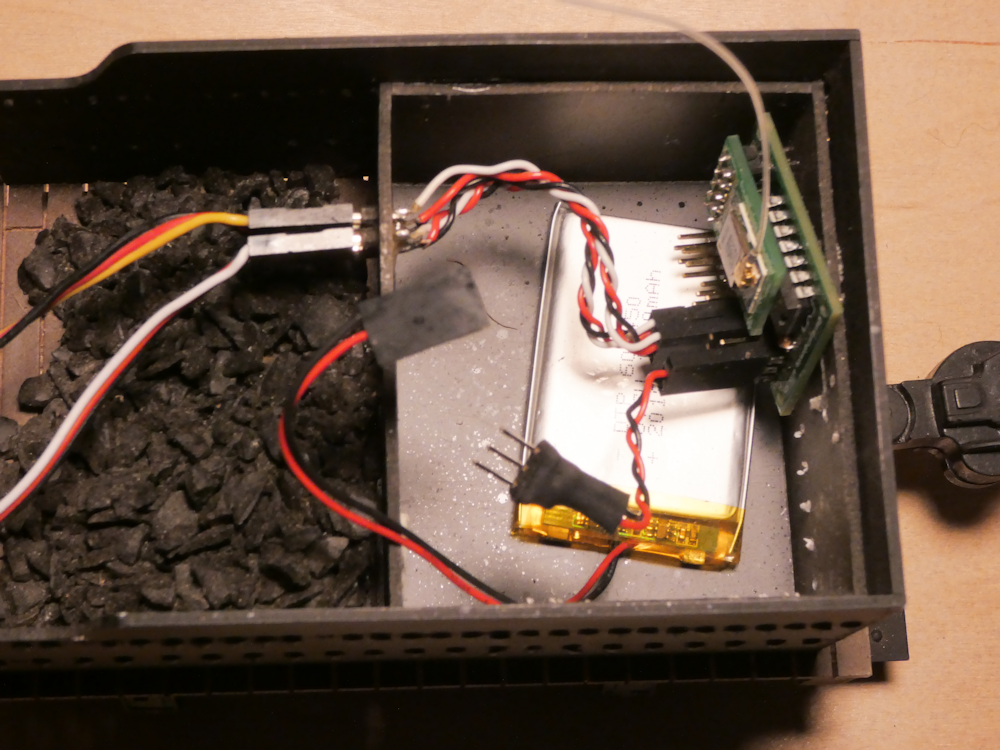
In my quest to drive ever larger locomotives, here is my latest development rig. It is designed for both very large motors and DCC. It can drive motors up to about 50A and can also supply about 8A of DCC. It consists of the Protothrottle Receiver, the Syren50 50Amp motor controller, a SoundTraxx TSU2200 DCC decoder, a Cytron Amp for the DCC, a 5v buck converter (to power the rx), a power relay and two motor trucks. One of the trucks is driven with the Syren50 and the other is hooked to the TSU2200.
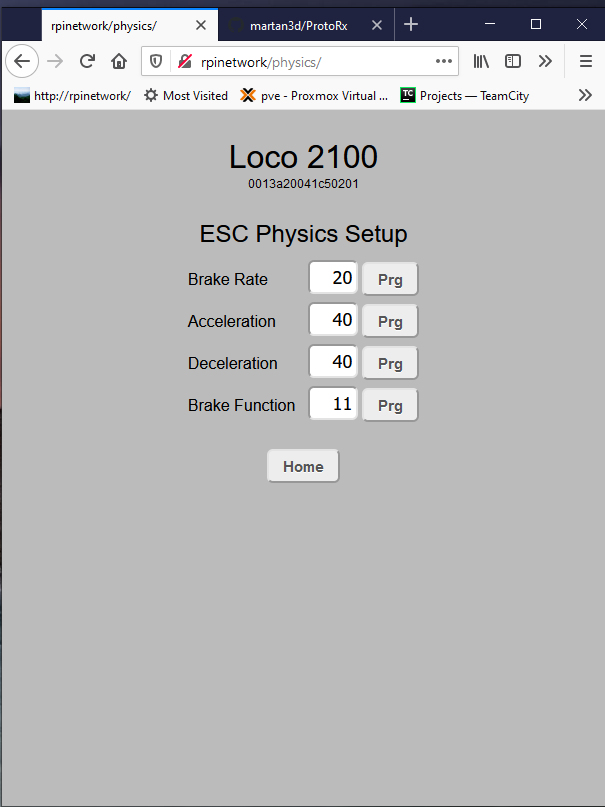
I am pretty close to a final release on this iteration. It includes a new ESC mode, PHYSICS, and four parameters for setting up acceleration/deceleration and braking with the Syren50 motor controller. The braking responds to the brake lever on the Protothrottle and has a variable rate. The brake function parameter sets which function code the brake effect reacts to. On the TSU, this is F11, so I’ve set that here to get the brake squeal sound out of the decoder.
With the exception of the Brake Function Code, all of the values are in milliseconds. These represent an increment or decrement of one throttle step every X milliseconds until it reaches the value sent by the Protothrottle. Low values closely follow the PT, larger values take more time to reach the PT value. The brake rate is similar, however it is affected by the amount of deflection of the Protothrottle’s brake lever. The more deflection, the more brake is applied.
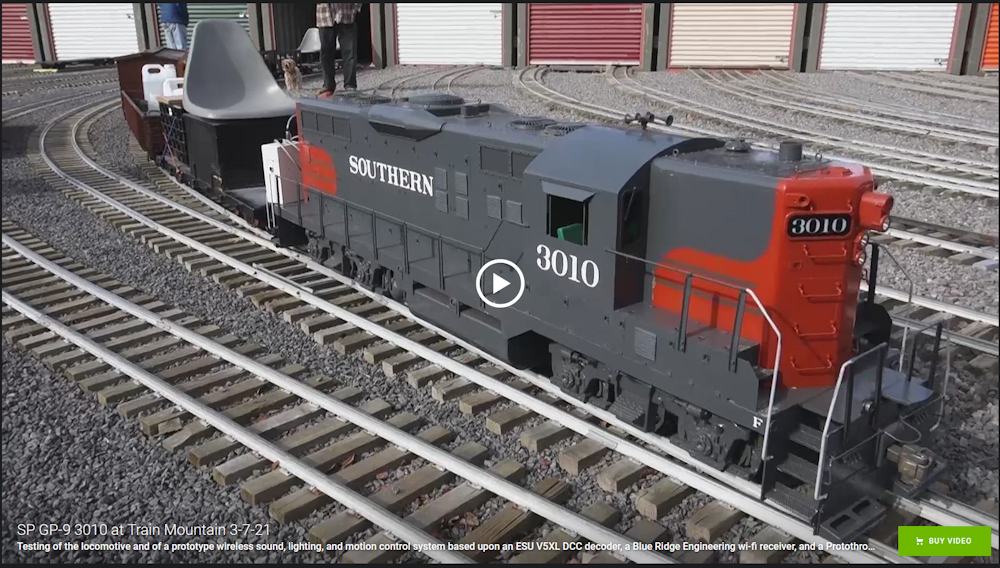
Here is a video of it in action. Note that the acceleration/deceleration of the large motor block, tied to the Syren50, differs quite a bit from the acceleration values in the decoder controlled motor truck. In actual use, these would be ‘tweaked’ so the DCC and ESC rates match.
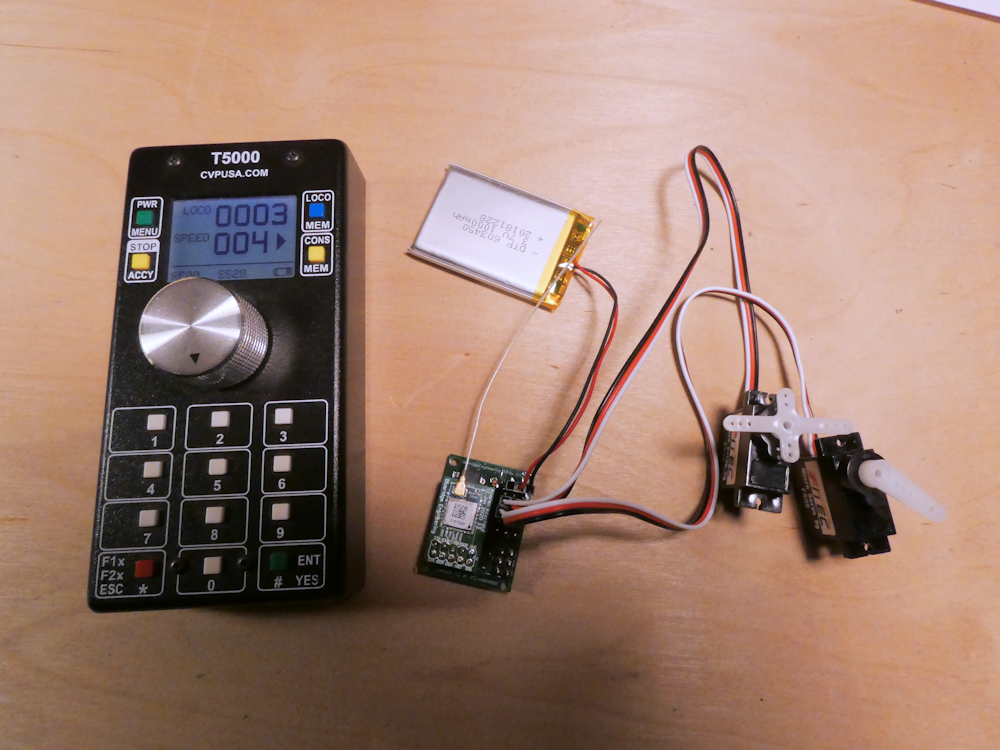
So it turns out the newest Digi Xbee3 network radios can do good ole 802.15.4 packets just like the older S1s and S2Cs. But one REALLY COOL thing they can do that the old ones can’t (ok there are two cool things, but I’ll get to the second) is they can talk Bluetooth BLE. At the same time as the regular Xbee network. And what is really neat about that is that the messages appear on the serial port, thus my application firmware can get these, interpret them and do STUFF. All sorts of stuff like actually control the throttle AND configure the module. Oh, and the second really cool thing is they have microPython built in too! Not that I know what to do with that now but it’s just really COOL 🙂
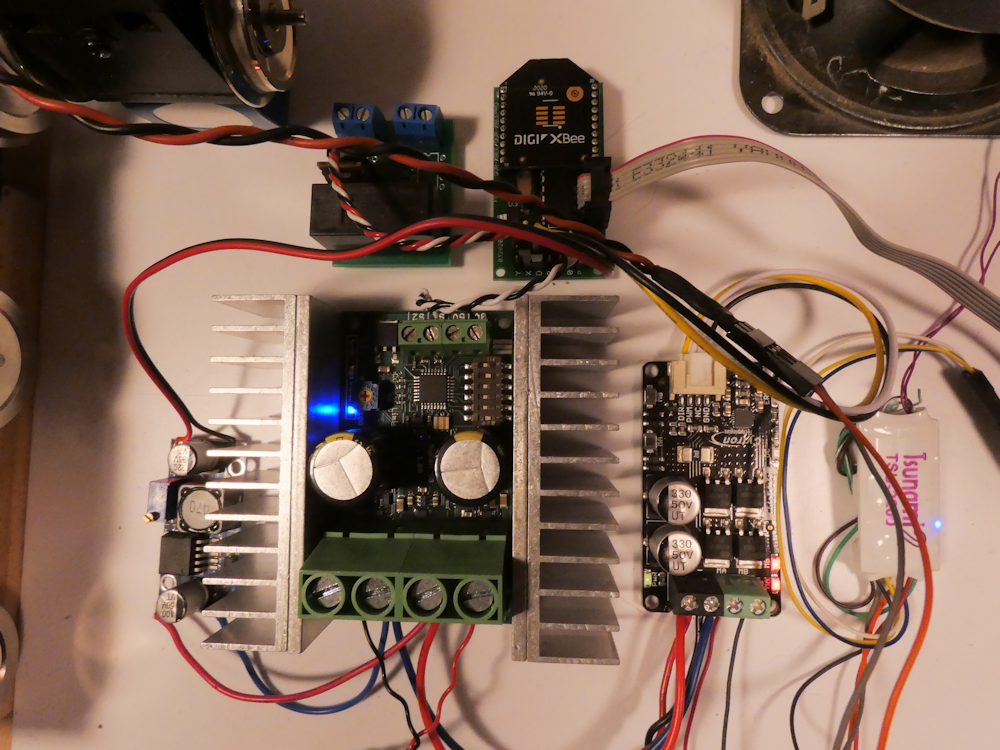
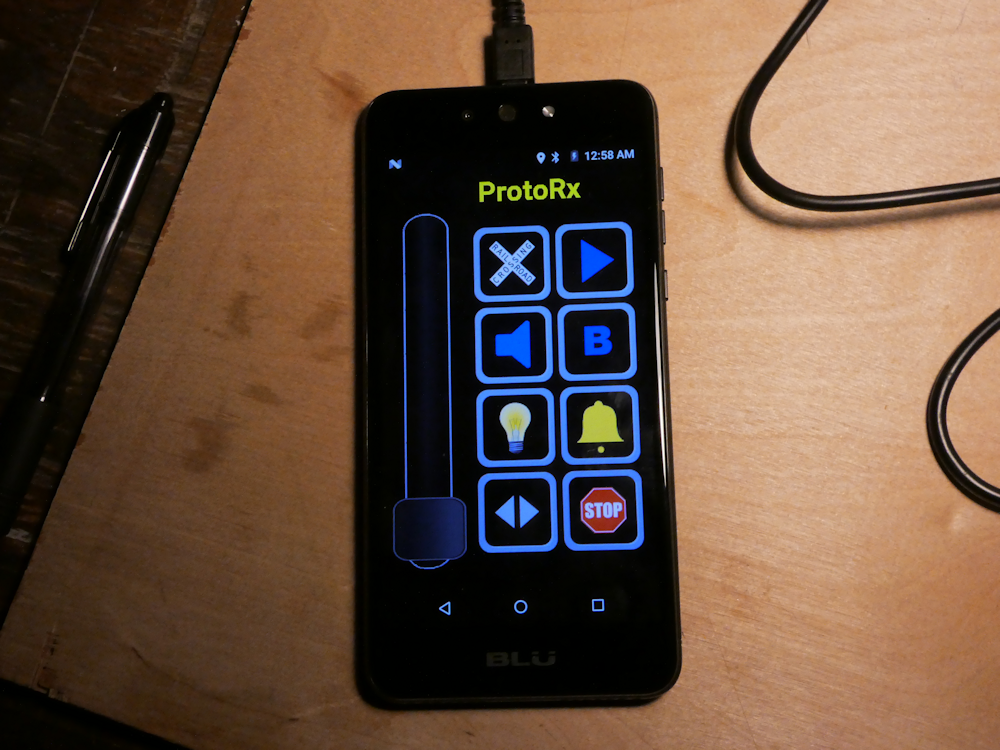
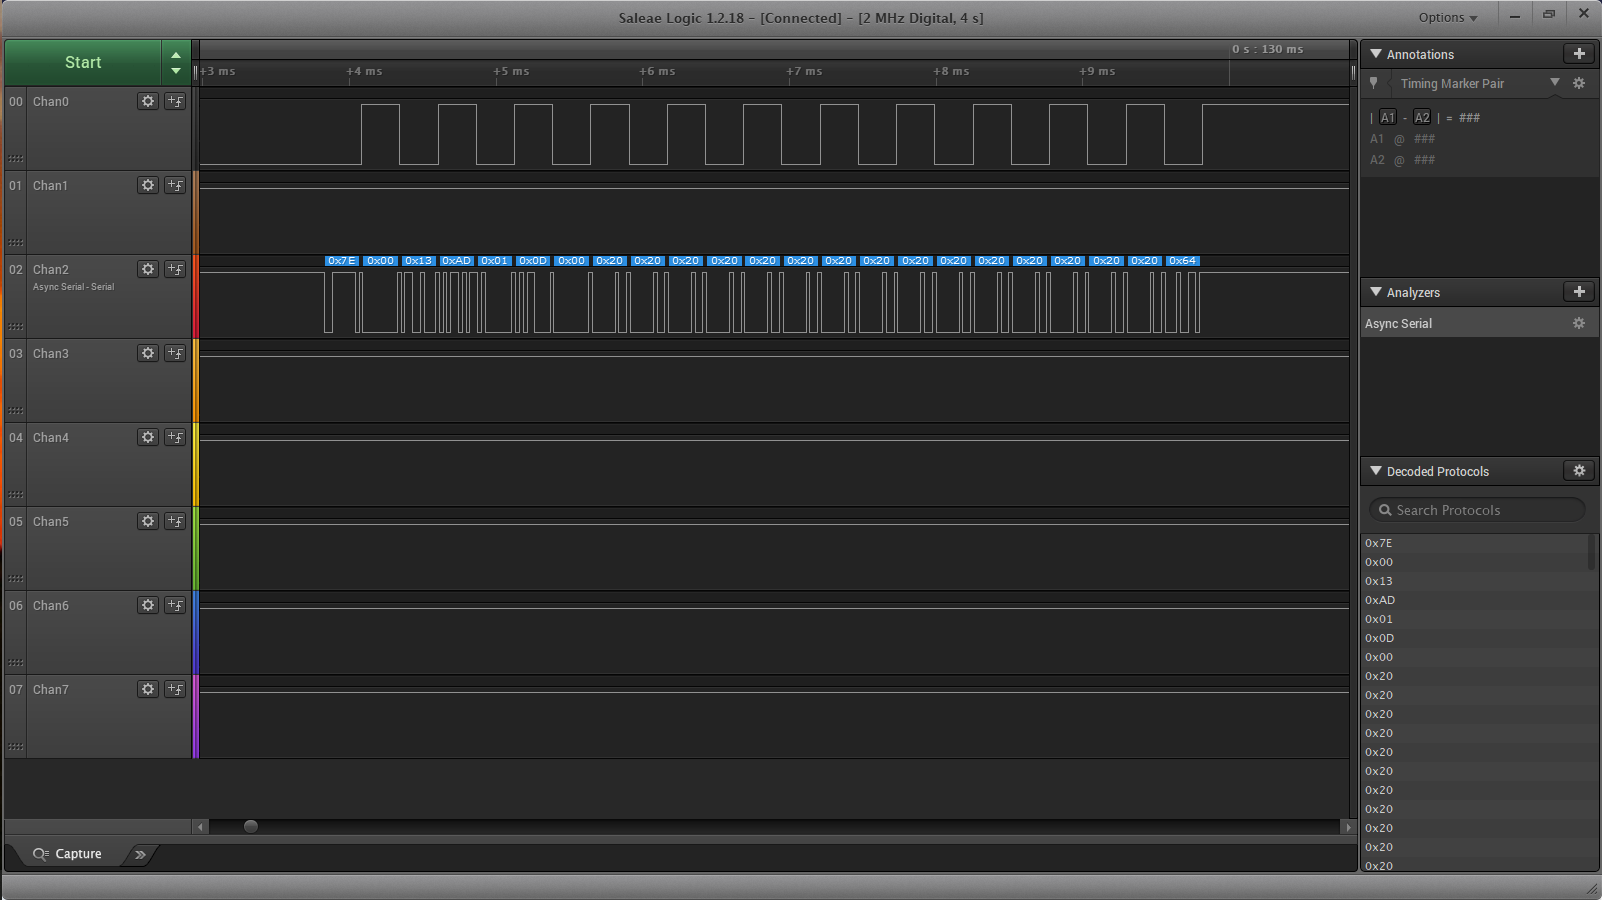
So, first pic is one of my Android phones (that I don’t have service on). It shows the connection to the Xbee3 via BLE on my little Android App. It was a bit of challenge to get the Xbee Library in there and there are still a few kinks that I need to work out (I have a love/hate relationship with Android Studio) but you can see on the second shot that I am getting valid Xbee Packets coming into my Receiver Firmware. Last pic is my setup (I have a Syren50 now)
So now I can have one receiver that talks to the Protothrottle and my phone at the same time. Sweet! I can configure parameters with the phone, or even drive the locomotive. I can also get data back to the phone (with the appropriate sensors), like speed, battery status, position, etc.
The original Protothrottle Receiver was able to control an ESC, but it just output throttle value as is, no manipulation. In some implementations this could cause abrupt changes in speed. So I added a new ESC mode, ‘PHYSICS’. This allows a standard center off ESC to now have a programmable acceleration and deceleration value. I also added a brake function that you can set to any DCC function code on the PT. This will allow you to drive a DCC decoder for the sound and lights, but actually control the motor with an ESC. There still isn’t any BEMF to feed into the decoder but I’m thinking on that one.
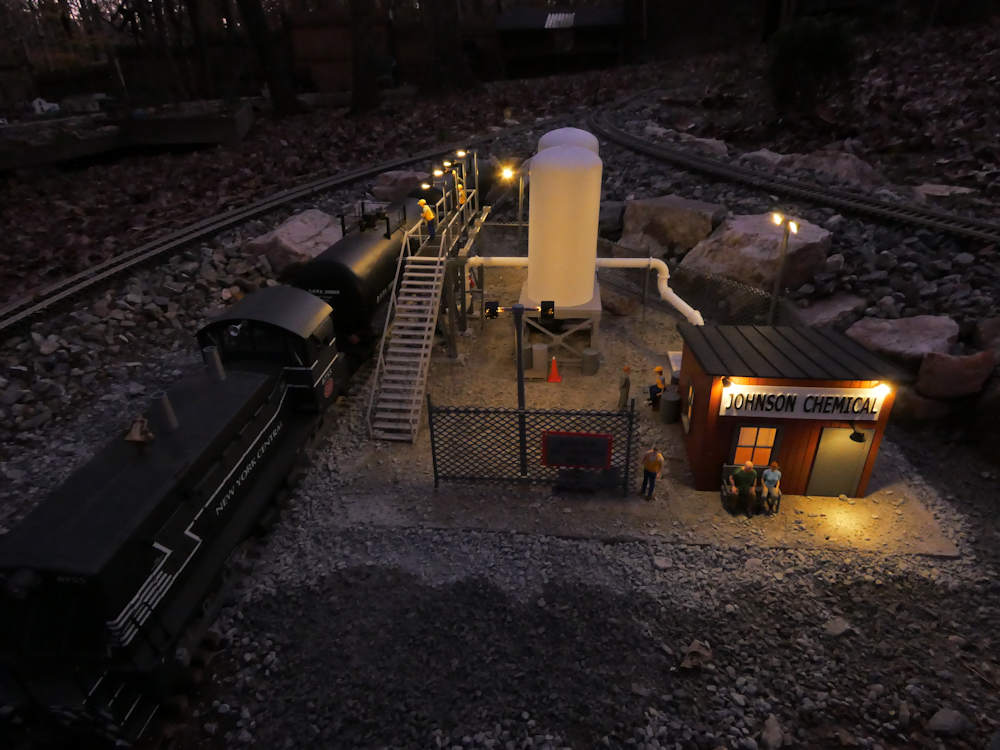
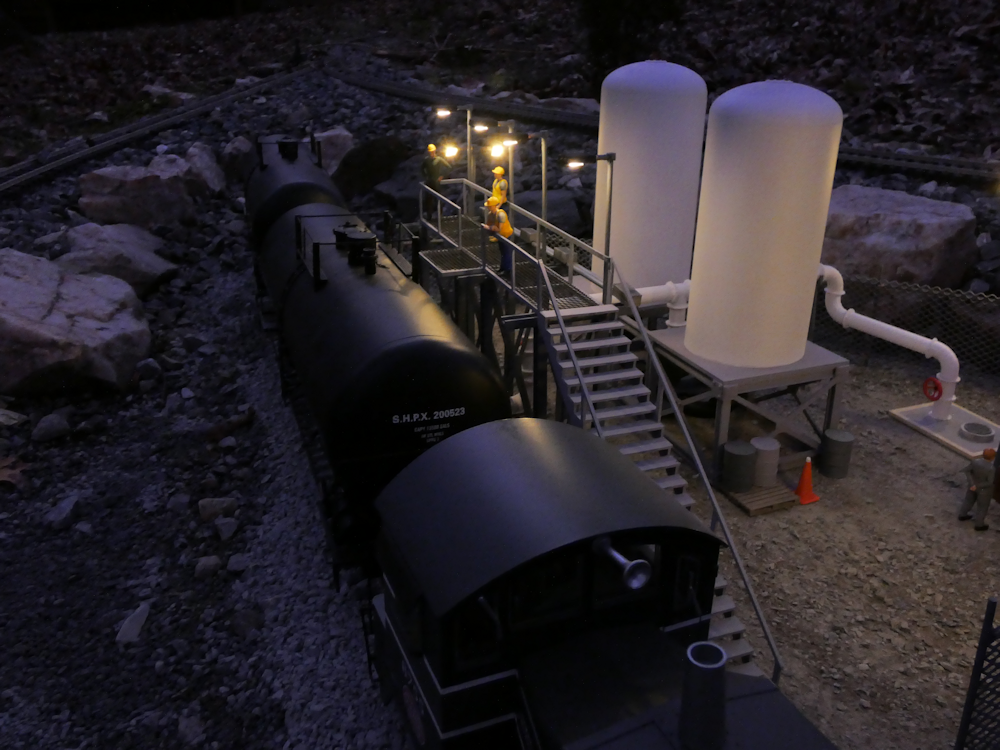
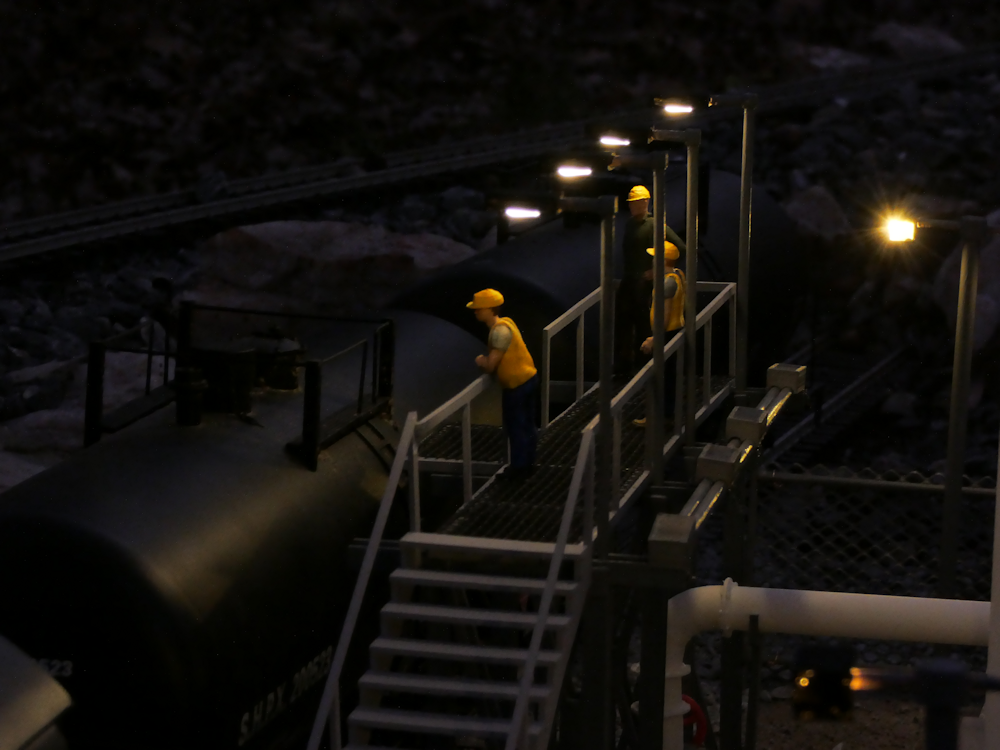
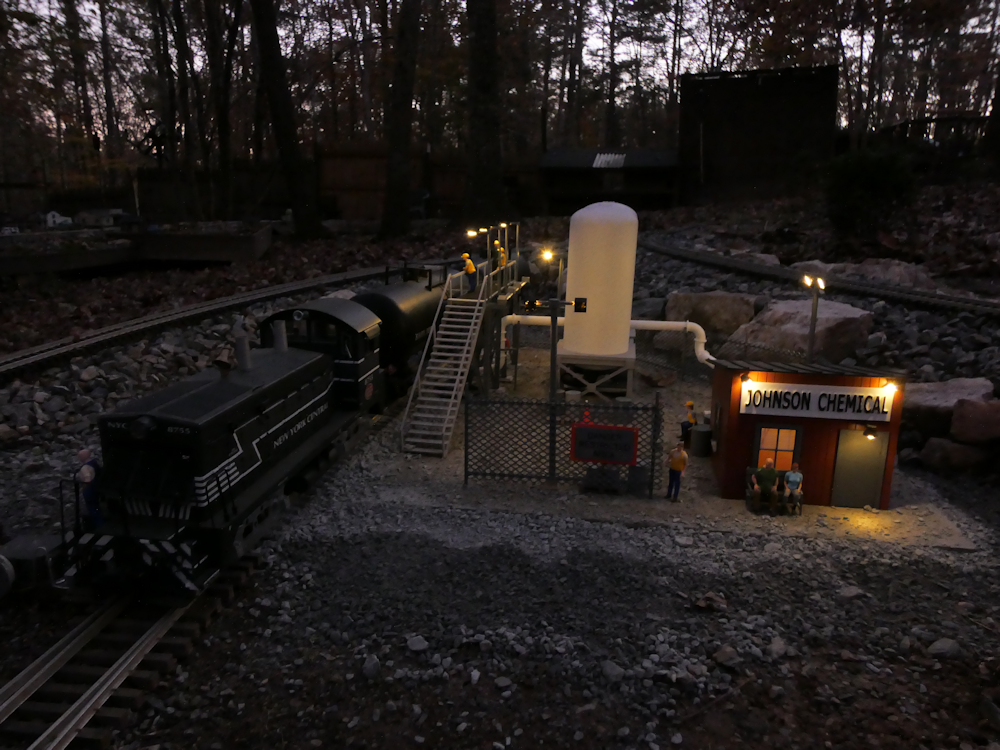
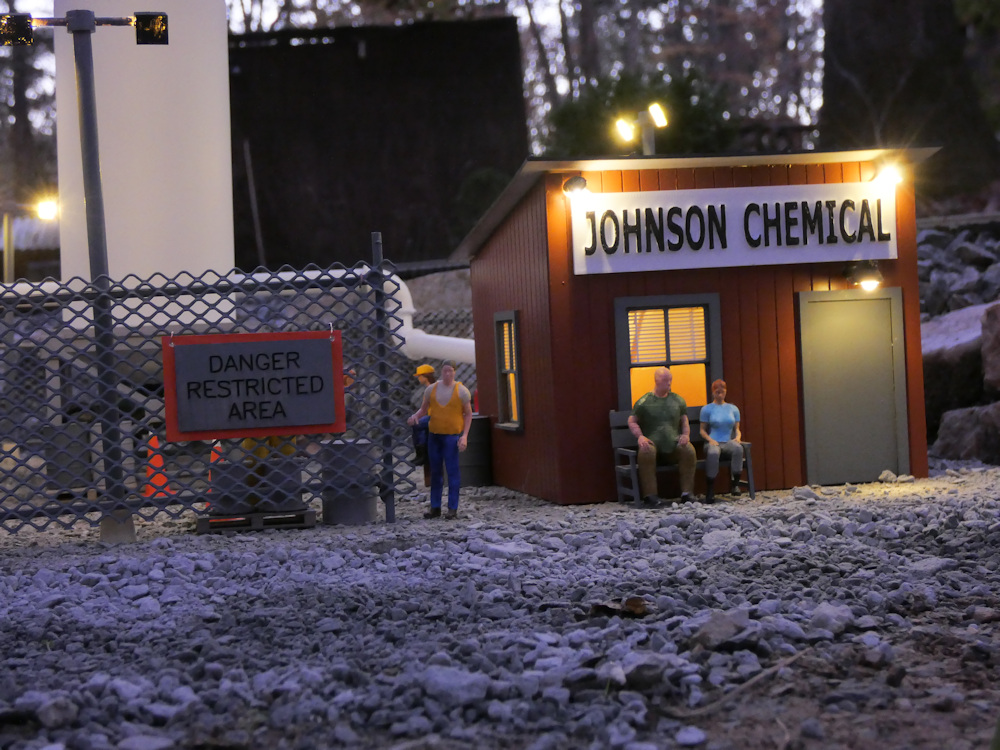
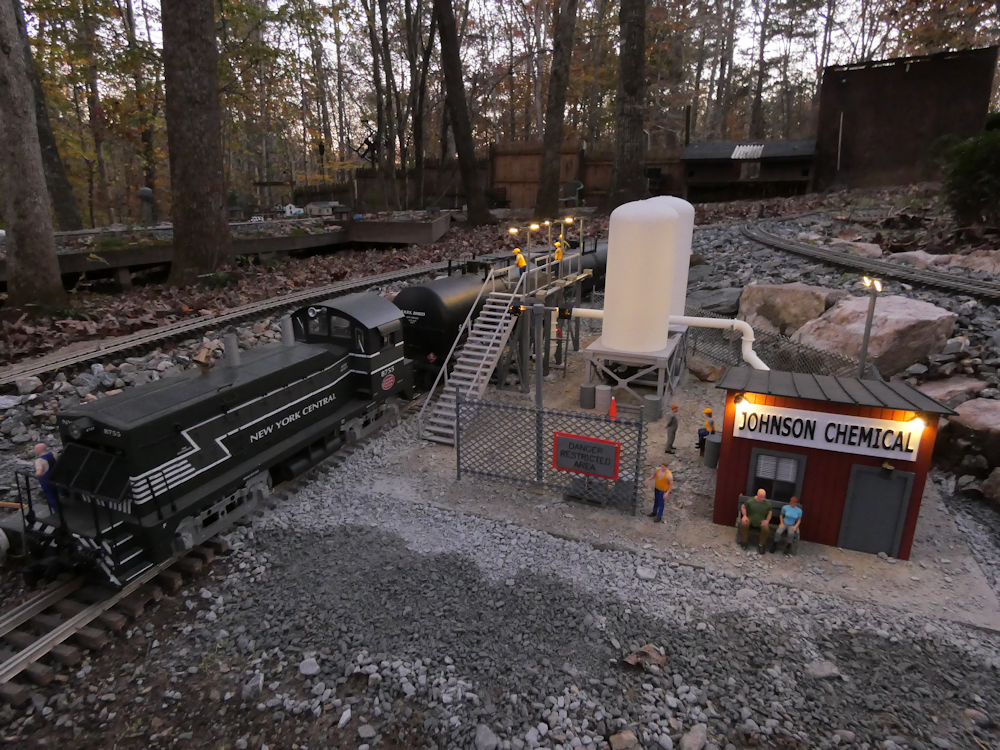
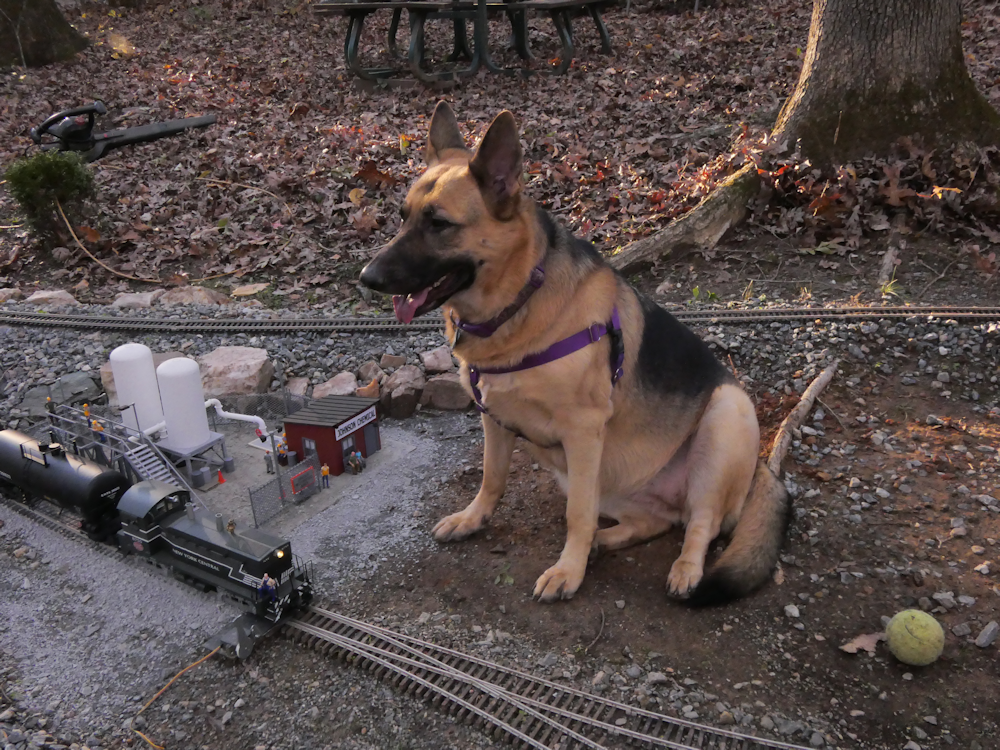
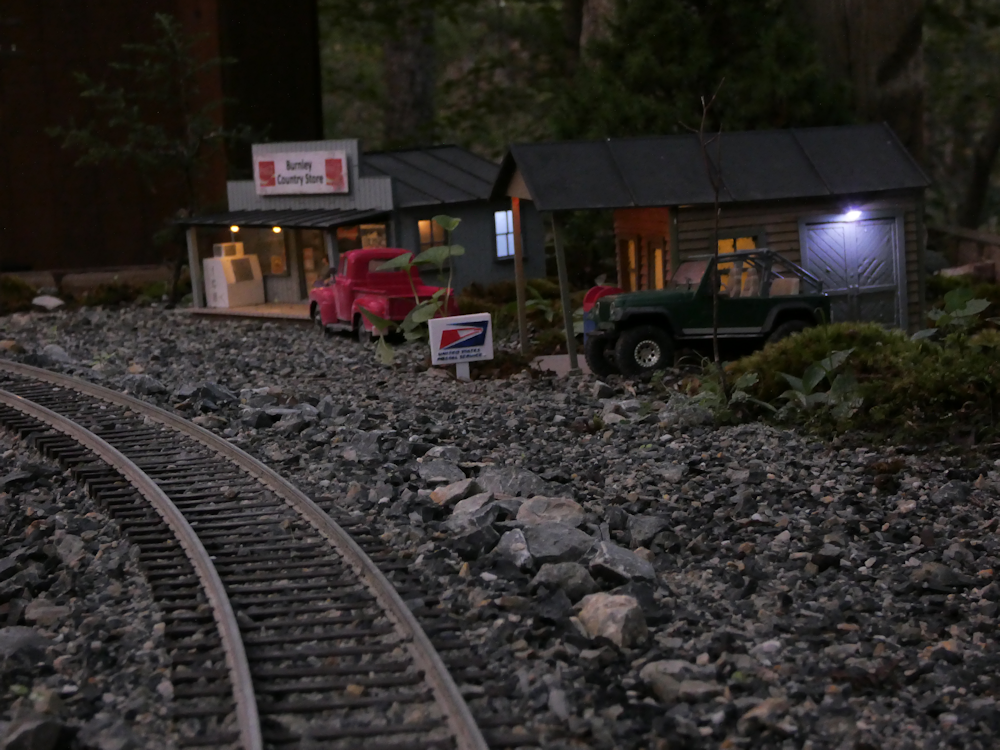
I’ve been building out my little towns with houses, stores and trailer parks, but I had nowhere to actually switch loads. So I came up with this little industry. It’s some sort of chemical company, I’m not sure what but it was in a good place to spot a couple of tank cars. I plan on a small office building/factory about where the dog is sitting, but have not gotten that far yet.