3D Design

people

Here are a couple of people I’m working on for the porch of my shotgun house. The originals were 3D printed, then I made molds from those. These are resin cast from those. Casting resin seems to be an art form unto itself, it’s difficult to get a perfect cast. Bubbles in various places produce voids, frequently in the face and feet. These came out pretty well though. Just need to clean them up a bit more and do some painting.

houseA
houseC

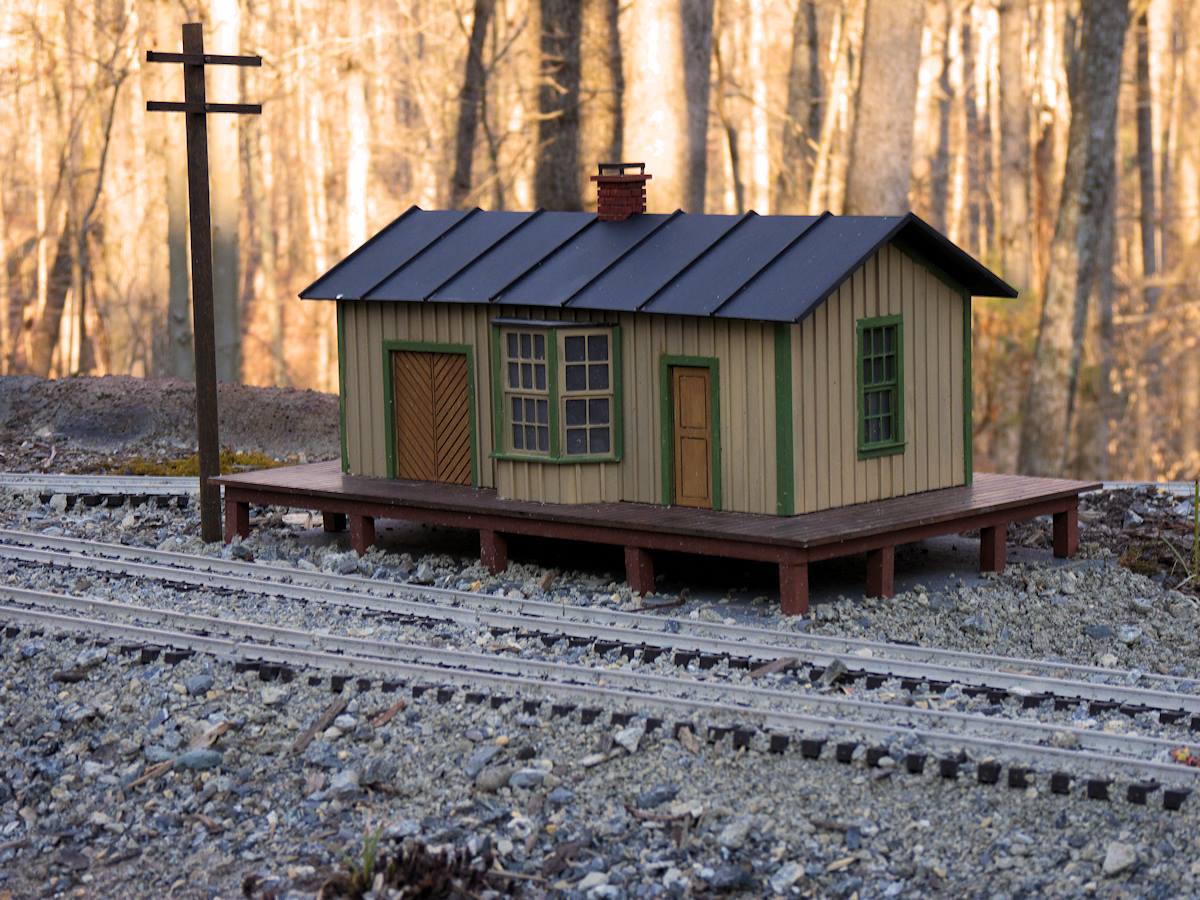
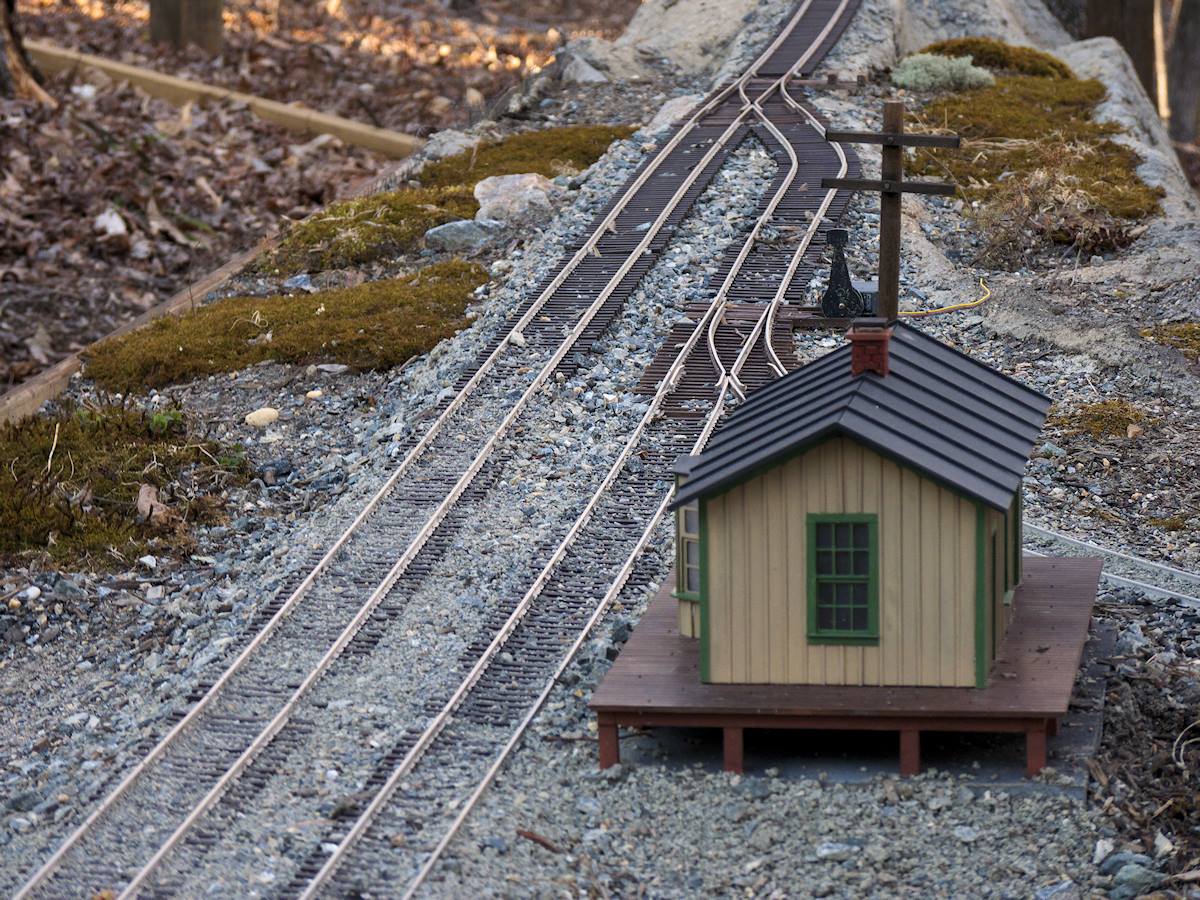
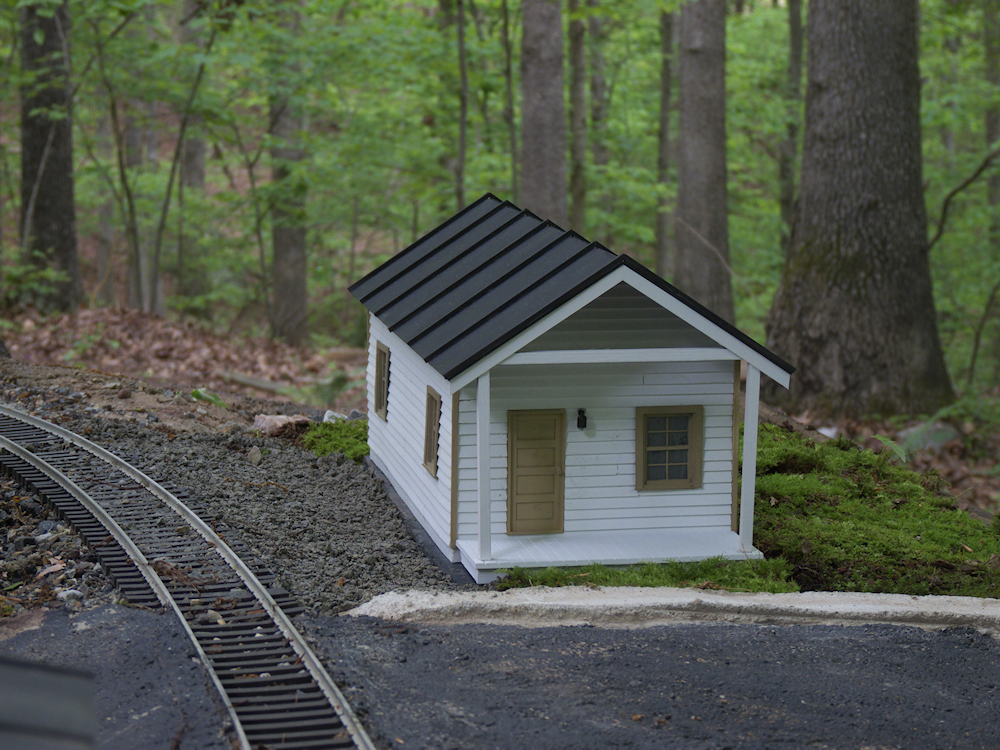
Here is my ‘shotgun house’. So called because you could shoot a shotgun through the front door and out the back without hitting anything. These were very common in the early 20th century, easy to build, standard lumber sizes, reasonably cheap. Often used in ‘company towns’.

Anyhow, this is my take on one. The sides are cast resin, I made two masters using (many) strips of .060 styrene to get the siding effect. Those were used to make two rubber molds, one with the brick base and one without.

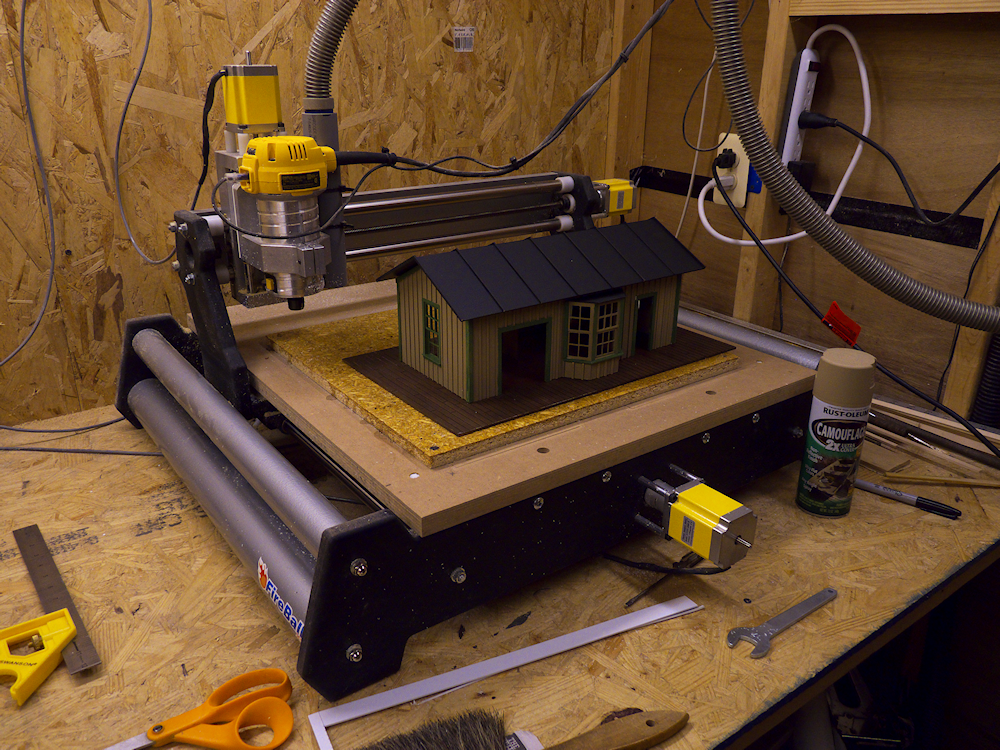
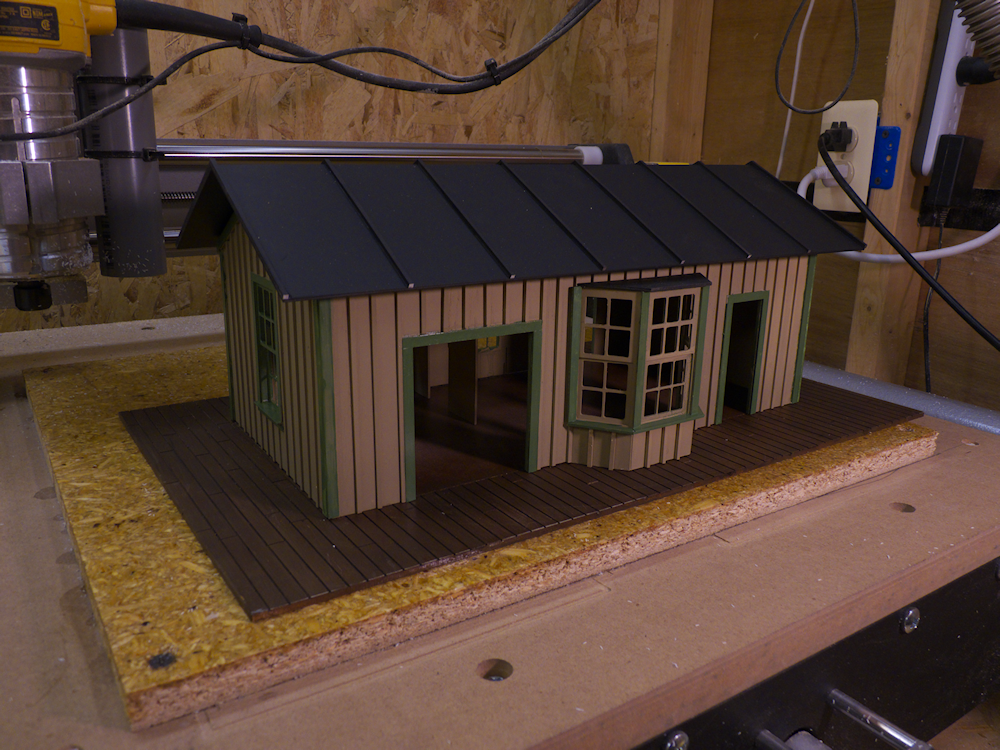
For the house, I poured three of the brick base and one without, then cut them out on my band saw. The windows and door openings were cut on my X90 3D router, (cured resin cuts very much like styrene it seems, sweet). The floor and roof are just straight cut styrene sheet ‘score and snap’. The window and door inserts are also cast from resin. Everything is painted with rustoleum flats- brown, white and for the roof, black. I have it wired with white LEDs inside and on the porch but don’t have 12v out in the garden yet. Soon.

depotA

depotB

Some pics of the final buildout of my train depot. Cut from .060 styrene on my Probitix X90. Finished up with Rustoleum flat cammo colors from rattle cans. This should fare much better out in the elements than my wooden structures, plus styrene is way way easier to work with than wood.

I use Inkscape to draw the plans, then the free version of CamBam to make the G code cutting paths. The X90 uses a Dewalt dwp611 palm router driven by a super PID speed controller. All cuts are made with preciseBits 1/32 inch 2 flute endmills.

depot1

depot2

Still have a ways to go on this but it’s coming out pretty good considering I don’t know what I’m doing 🙂 This is all cut out of .060 styrene sheet using my X90 3D router, Inkscape and Freebie CamBam.

I’m finding I much prefer to cut styrene as opposed to sheet plywood or blocks of pine. Styrene is an ideal material, it cuts easily, produces WAY less ‘chip dust’ and can be assembled with Testors sorts of plastic model glues and paints. This particular design is based on a photo from the VA Tech archive, a picture is in one of the posts below. I actually wasted only a little sheet on this one once I got the correct spindle rpm and feed rates figured out.

3guys-sm

I think I have too many irons in the fire sometimes but here is the latest shipment from Shapeways. On the left is a 1:20 scale print of my trusty foreman model, in the middle is the secretary/waitress in 1:24 and to the right is the conductor in 1:29. I’m very happy with the quality of the foreman fellow in the larger size, the details are quite good. The waitress was a real pain to get printable but she came out pretty good too. The Conductor in 1:29 had to be printed in the ‘detail’ plastic but it was worth it I think.

I have a store front on Shapeways now – Blueridge Engineering