
Other Stuff
I’m getting ready to refactor the software for both the client and master so I decided it would probably be good to shoot a bit of video showing everything working and driving servos before I break it for a while. This shows servos on channel 1 of both clients moving via the knob on the master. There is a bit of dead space on both ends of the knob rotation but other than that it tracks really well. Note that I click the somewhat silly keyboard to select between the two clients. Anyhow, you can see other posts I’ve made of the timings and message passing but I wanted some real world video to show just how well it’s working. So here ya go. Next up is getting the RFID via Xbee and the slave sound card up and running. Almost there. That’s up next.

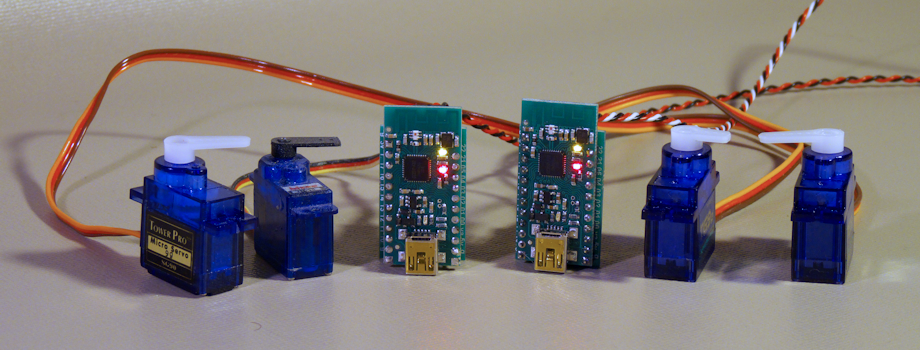
The two current widgets. The Xbee client is in the upper right hand corner- it sports wireless bidirectional communications following the 802.15.4 protocol. FCC approved, 300 ft range. It controls servos, motor controls, discrete outputs- lights, solenoids. Also has a serial input for an RFID reader. Additional inputs are available for current sensors or distance/speed sensors. This is my locomotive Frankenstein. I am really happy how this has turned out. I’m working on a set of simple PCBs so all of this can be just soldered in. (soldered and wired breadboards are a pain sometimes)
In the center is the sound widget. Up to 200 stereo mp3 files can be triggered from R/C inputs or discrete buttons presses or switches. You can put ridiculously large SD cards into it. Like 32G of sounds. You can trigger music, sound efx, whatever you want. A 1 watt amplifier is onboard- more than enough to drive a large speaker.
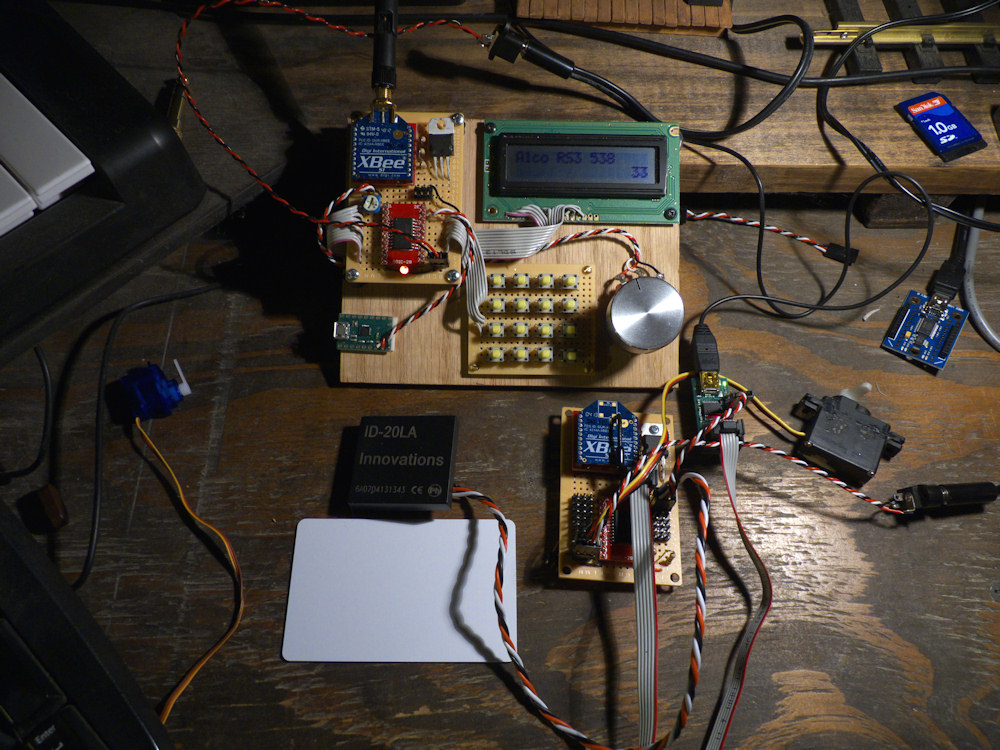
Finished up another client, I can now control two from the handheld, just push one of the keyboard buttons to change to the next locomotive (Xbee Address). Point to multipoint. I like it. I also got the RFID reader working, quite nice. Super simple interface. This is the ID20LA from Sparkfun. I’m using the big thin credit card sized tags and they work really well, even at speed. Put a reader on the locomotive and embed the tags under the track and I think this will work great.
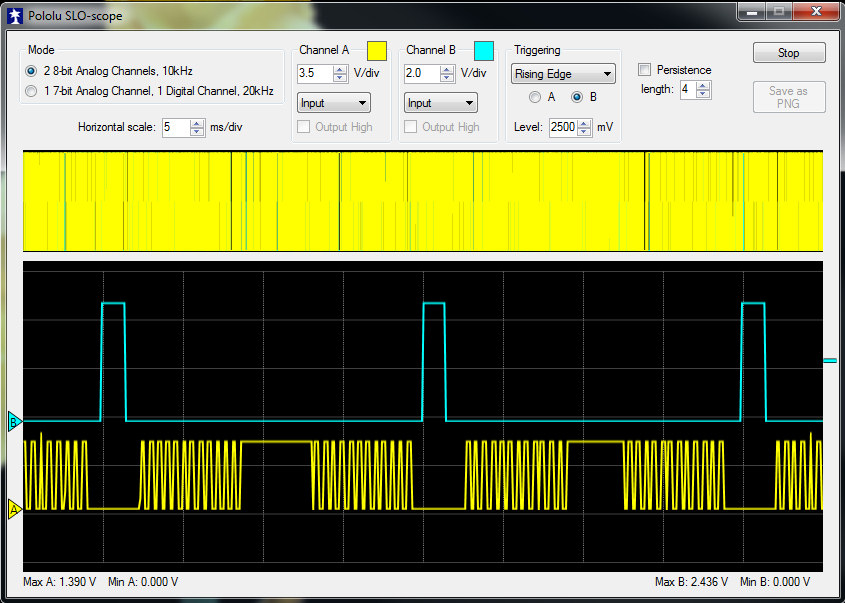
After all the work to get things really fast, now I’m going really fast but not very often. I’m taking a snapshot of the ADC knob (throttle) and if it’s close to the last time I read it, I don’t send out any RF update. This results in a LOT of silence on the network, more than enough time for other packets to bounce around as the complexity of the network develops. This is really working VERY well so far, simple circuits, stick to standards and minimalistic coding practices. As Jessie Pinkman would say, it’s SCIENCE BITCH!
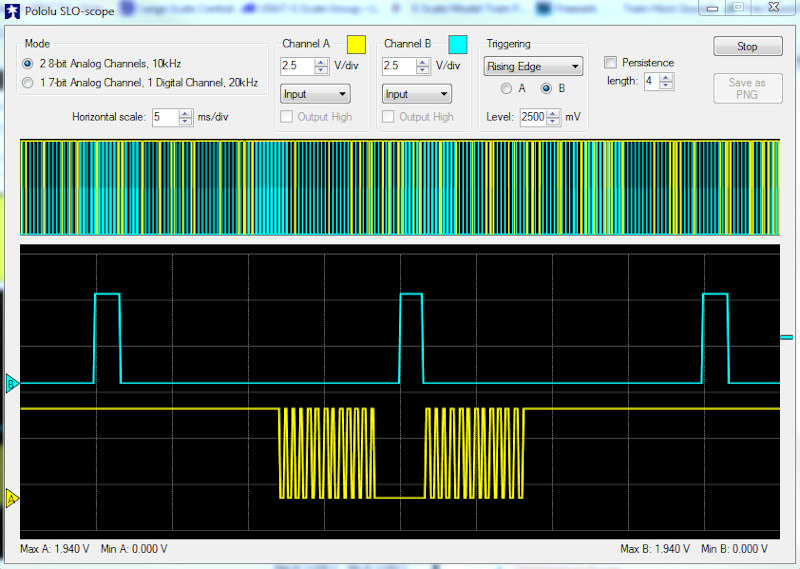
Ok, more tweaking gets us to 10ms per xbee data packet. Well, per cycle, each packet is about 7ms long, a total of 25 bytes with 16 bytes as the actual data payload. This leaves about 3ms of ‘I completely ain’t got nothing to do’ idle time. Sweet.
This sort of update gives a really smooth servo movement from the knob on the master to the client. I’m thinking I’m approaching the limit of what I can do at 8mhz. Or close. I’ve tried to go faster but get nothing. According to the data sheet, if I go above 38.4k and don’t set the ‘double’ bit, the error is over 2% which won’t fly. If I do set the double speed bit I think I can crank it one more notch to 76.8k and get a 0.2 % error which is quite good. Any of the other, higher baud rates are going to require a crystal at a ‘baud friendly’ frequency or a tweak to the fuzes to get the internal clock lower, neither option I want to do right now.
Anyhow, this rate gives two complete data updates per servo cycle, that means I can get a smooth throttle control for a two locomotive consist depending on how I do it. You could either send both locomotives individual packets from the hand held, or have the ‘master’ locomotive send a ‘slave’ packet to the other on the consist. That will be some interesting R&D there.
I’d would like to get this faster, to take it to the limit of the over the air rate (250kbs), but I’m pretty sure it will take a hardware change for even half that. Also, I’m not sure the Xbee will handle above 115.2K on it’s UART so I’ll leave that for phase 2.
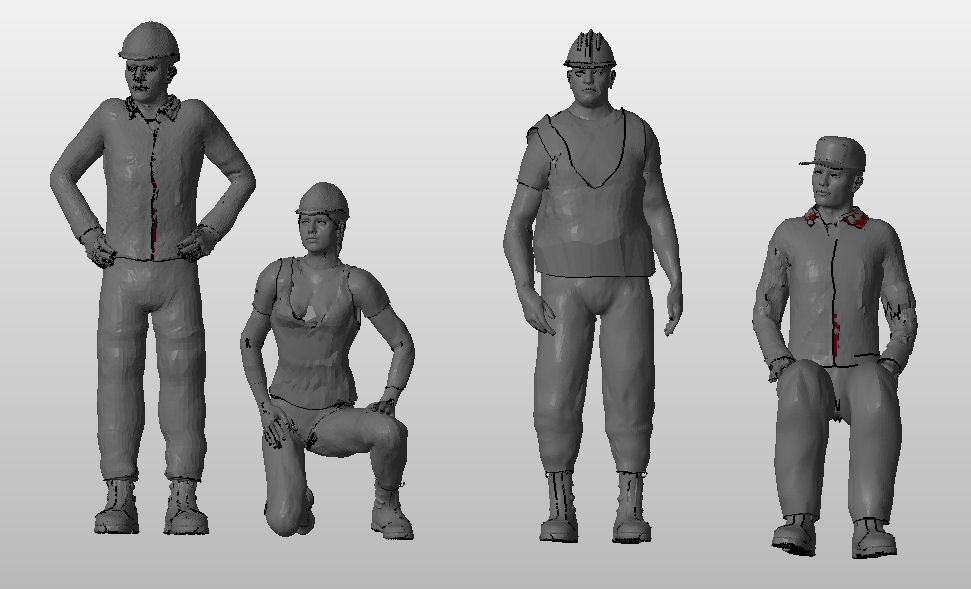
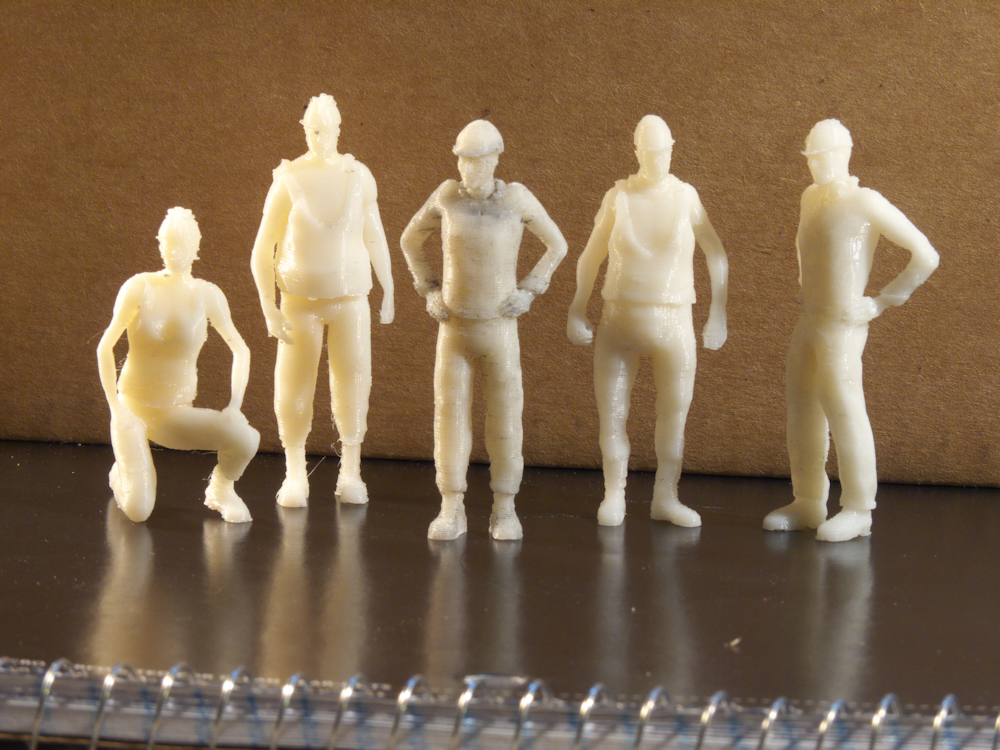
I seem to be getting interested in 3D printing again, I was doing quite a bit of it before the summer but then got my brain infected with electronics and software (I tend to do that) so I decided to revisit some of my older work. Here are a couple of people, they are meant to be a construction crew. They came out pretty good and I learned alot but I’m not sure they are really up to snuff for selling. So, I’ll give them out to folks who want to try some 3D printing.
If you would like to download the stl files that I send to the 3D printer, here is a link: http://martinsant.net/3dprint/
Here are some of the actual prints:
I’ve released the source and executables for my Master/Slaves Wixel Software. This uses one Wixel as a master plugged into your Raspberry Pi USB to control up to 64 slave Wixels via 2.4Ghz wireless. Each slave can control 6 R/C type servos and monitor 3 analog inputs. I’ve also included a Python class for the Raspberry Pi, some HTML5 javascript and graphics for the user interface and instructions for running your Pi as a web server.
More info on it is here: http://servowidget.com
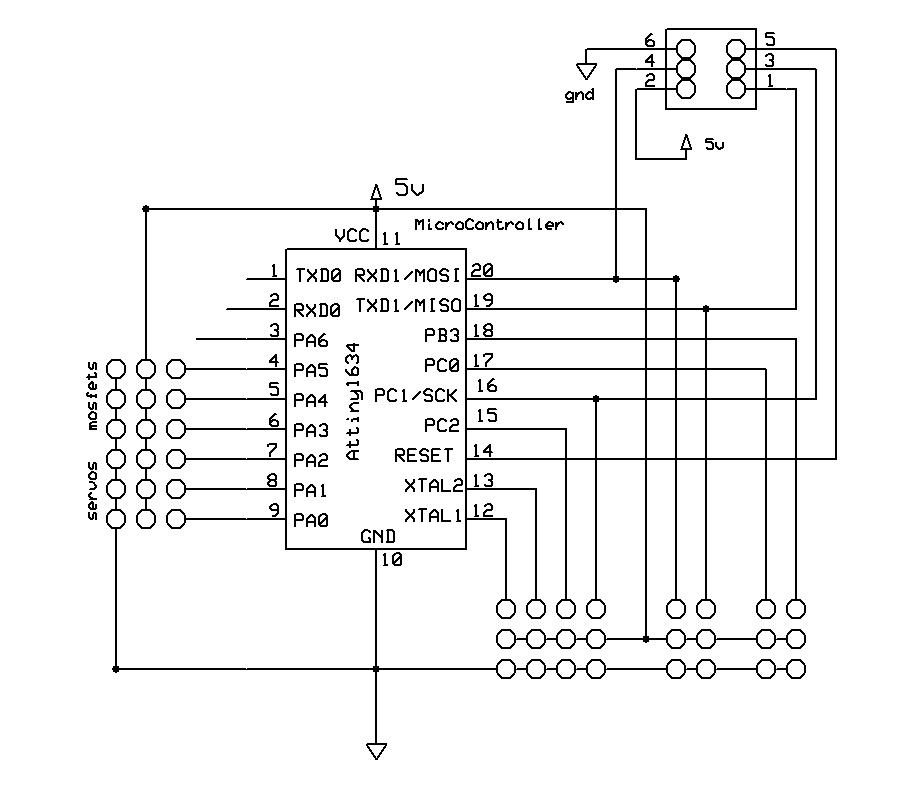
This is the base circuit I’m using for all my designs these days. Ridiculously simple. The TX ports at the top of the chip can be used to export debug information to a TTL serial port or control/read other peripherials (wireless, sound etc).
The debug port plugs directly into the Pololu USB AVR programmer. Combine this with Atmel Studio 7 and this is a powerful development package.
You have the choice of C or C++ as far as a programming language goes. Personally, I favor vanilla C, it’s easier and I think, faster.
Anyhow, the Attiny 1634 is a SOIC surface mount chip, you can use a ‘schmart board’ available at your local Radio Shack, or you can order a 20pin version from Sparkfun Electronics to make breadboarding easier. I’ve uploaded the data sheet for this microcontroller to my site, you can find it HERE
Ok, as you can see, I’m into minimalistic designs. This is a super simple circuit, you can have this up and running including the Pololu USB programmer and full development software for, uh, $30 or so. Yes, you will have to do some soldering but it’s well worth it.
Programmed correctly this chip will drive servos, motor controllers, ESCs, lights and other loads. And (again) with the right software, it can also read servo pulses from a standard R/C rx and let you do things with that. Move the stick or knob on your RC transmitter to set lights, trigger sounds, etc.
I also have hooked it up to an XBee 802.15.4 real time radio module. (Super tiny and it’s $20) to do wireless up to 300 ft. So you can do that too. You can also connect an RFID reader, or perhaps a current sensor and a speed indicator. There is a tremendous potential with this chip. 16K of programming space, 1K of RAM, 256 bytes of EEPROM and two full speed serial ports. Freaks me out personally, your mileage may vary 🙂
A new widget I’m working on. R/C sound card. My favorite 1634 Attiny micro controls an mp3 player. Supports up to 200 mp3 files on a 32G Micro SD. Built-in 1 Watt amplifier drives a speaker directly.
It also has 8 sound triggers using buttons or switches in addition to the R/C interface.
You can arrange the sounds with your computer to play anything you like. Engine sounds, horns, bells, music, speech, anything.
First prototype power up has the board LED blinking and the mp3 board online. Yep. Like it.